
Making of Sampa
This article was originally written as an interview for mapcore, but since the images are broken in the original link, I'm reproducing the content here.
Before we start, a quick disclaimer: By no means this is the only way to make environments, but rather a glimpse on how I went about making this environment. My workflow is always changing and evolving and information contained here might already be outdated or irrelevant. No environment is the same as others, hopefully you can take one or two things from this and apply on your own works.
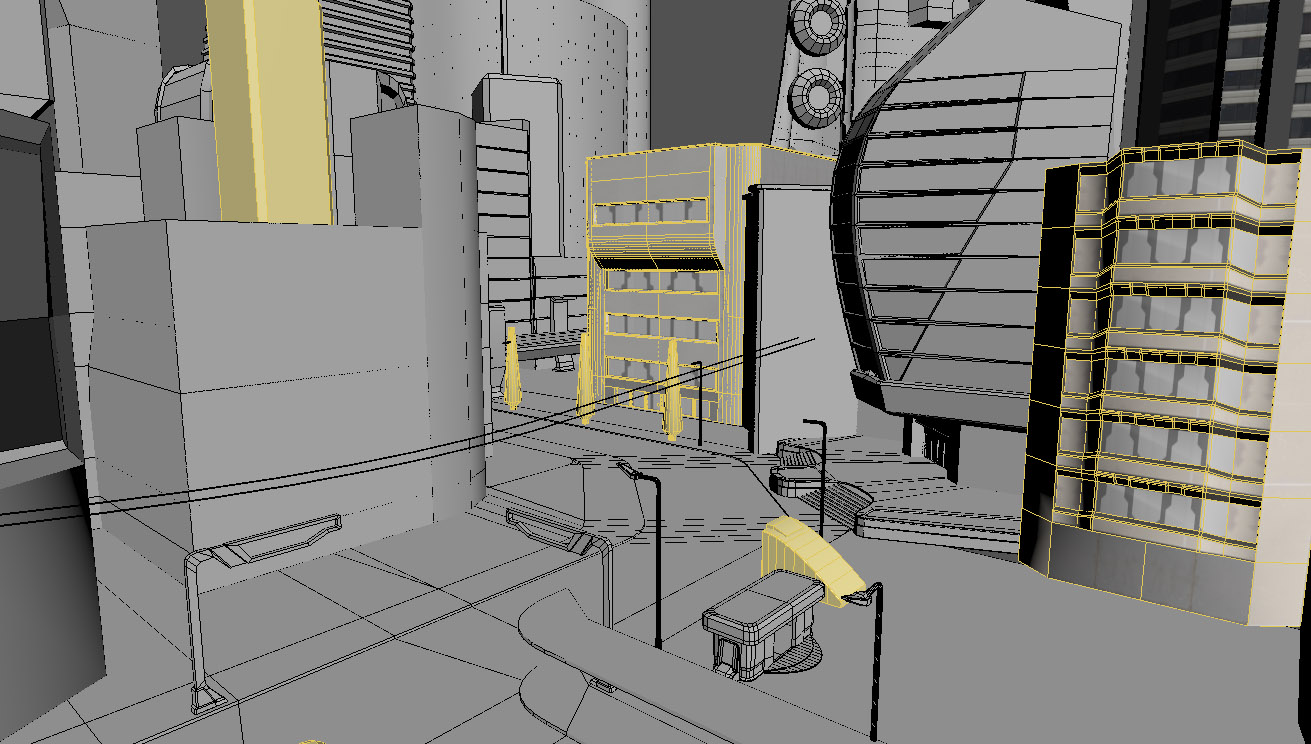
Blockout
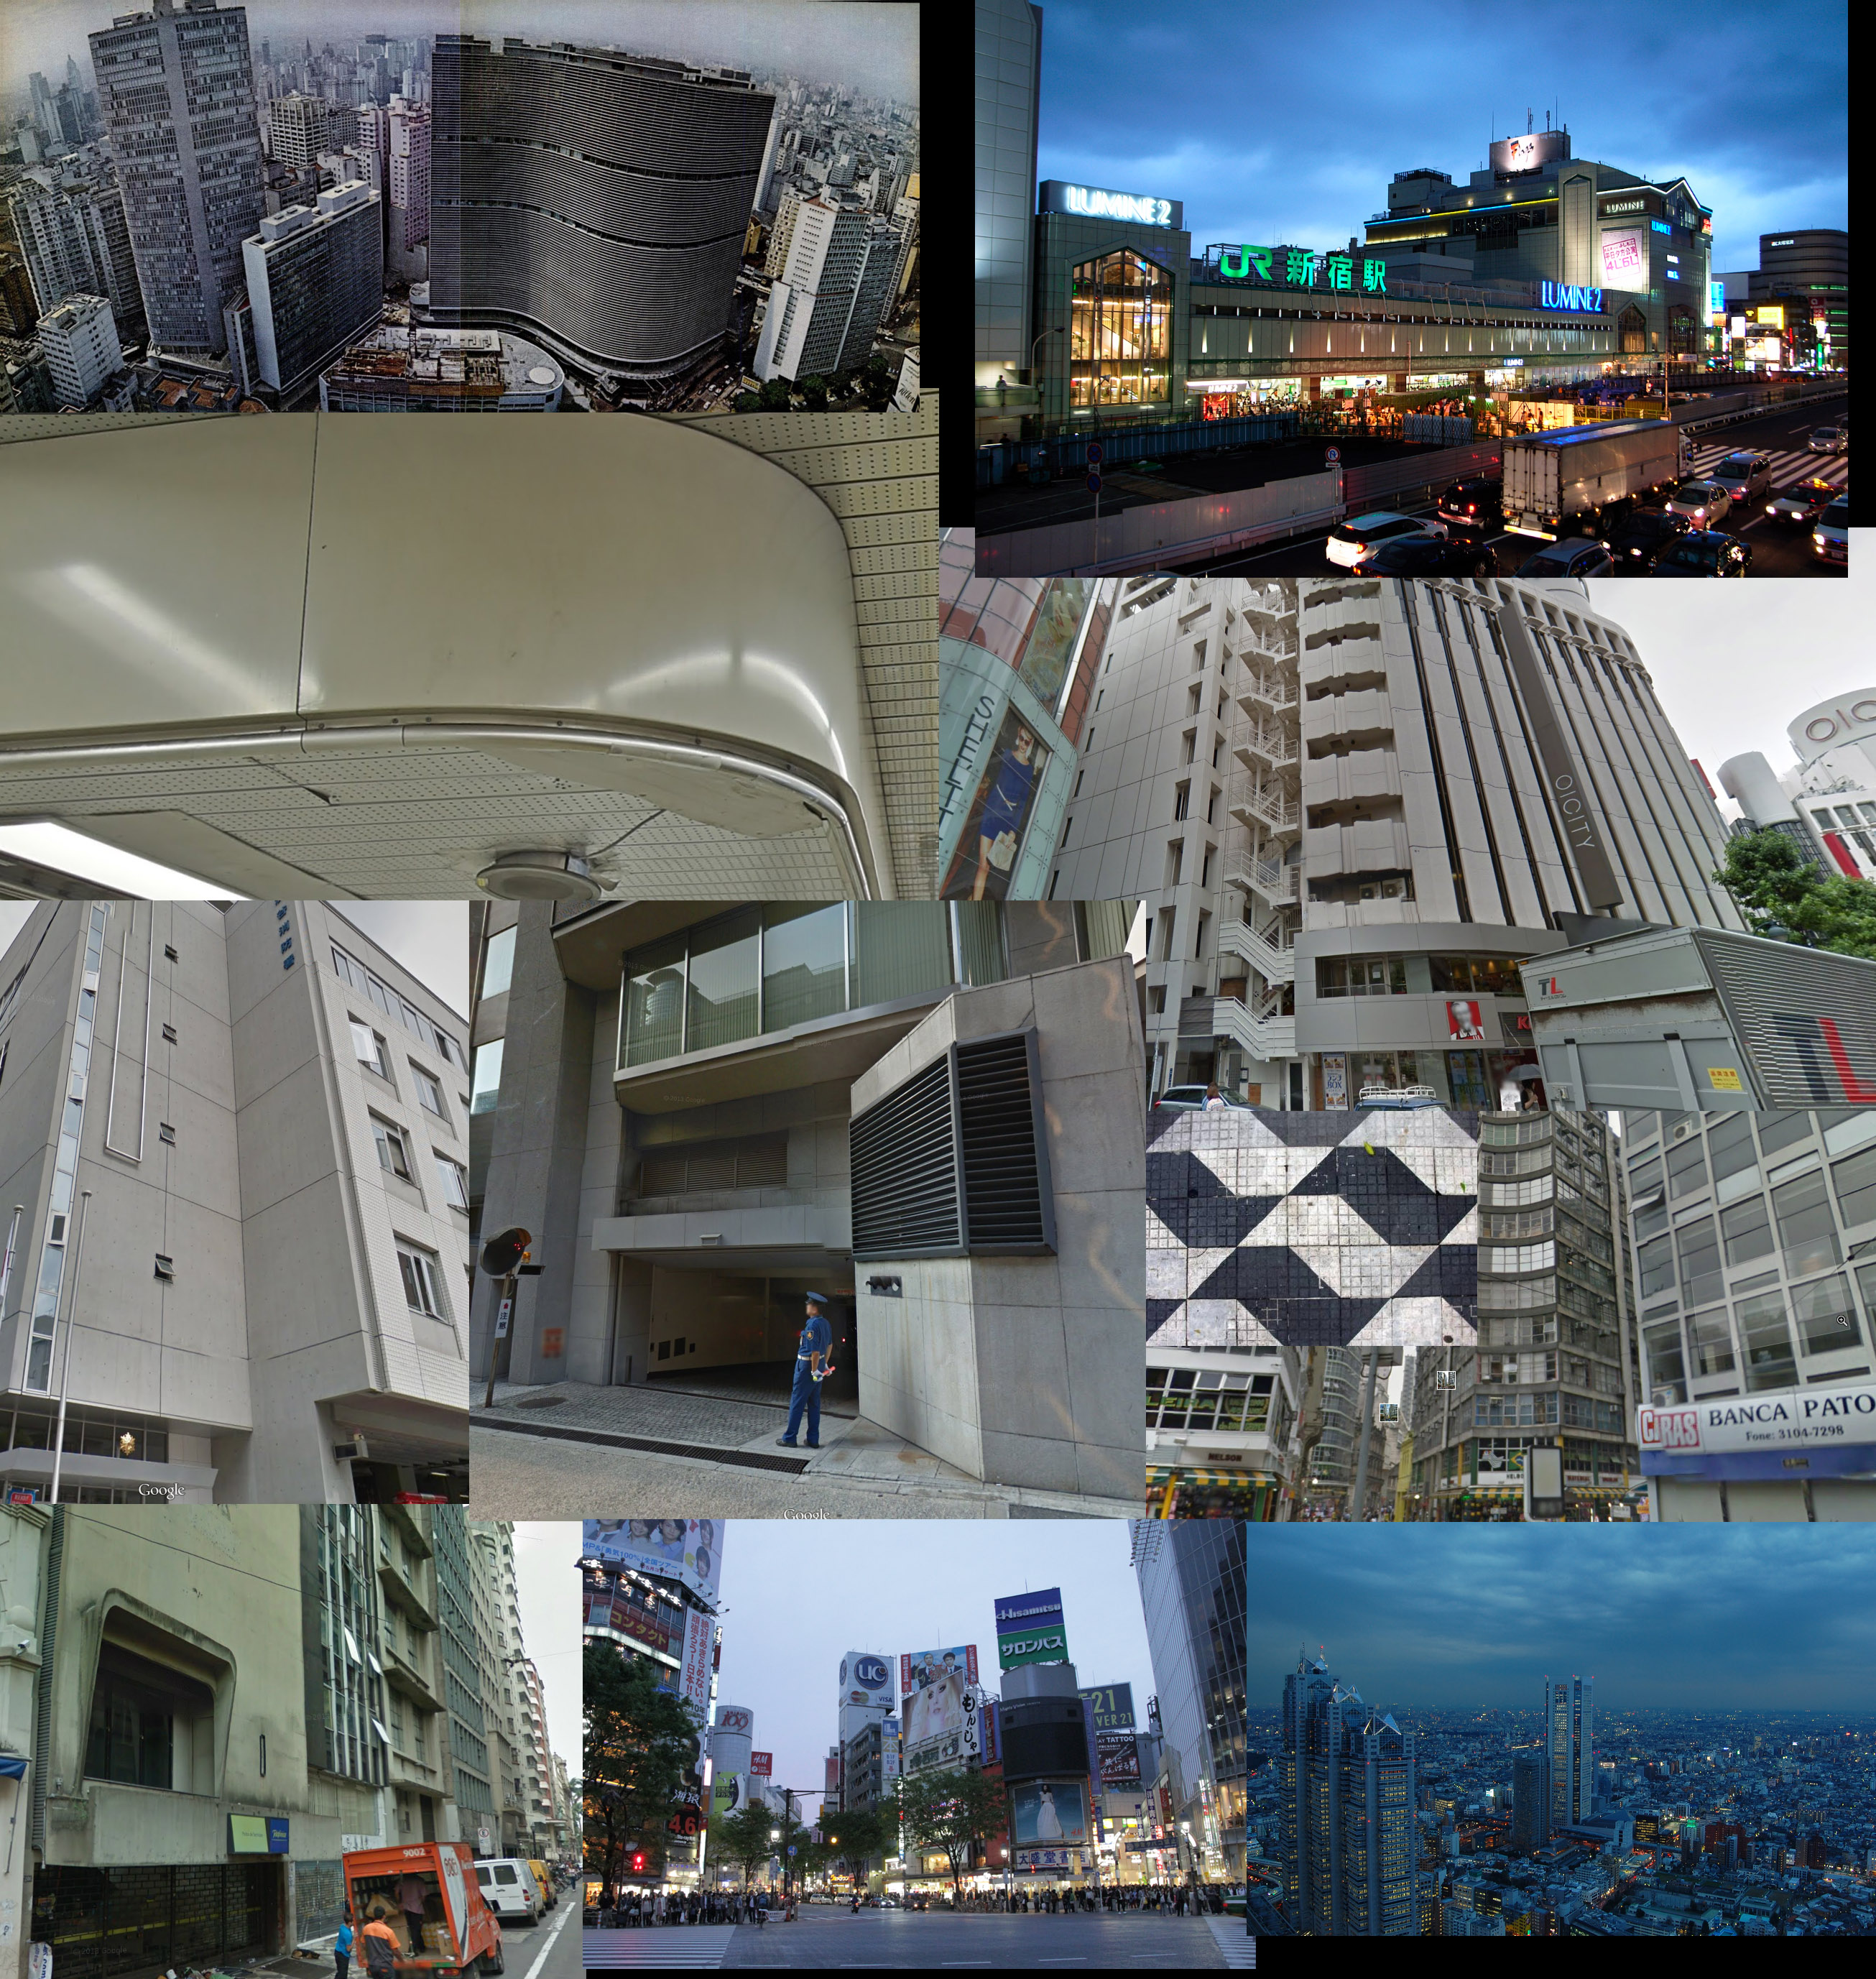
The very first thing I did was to blockout the entire space in 3ds max. I didn't want to spend too much time on this, so I avoided thinking too much about how I would build this and instead just focused on making cool shapes. By importing everything as one single file into the engine, I could quickly check out how the map looked ingame.
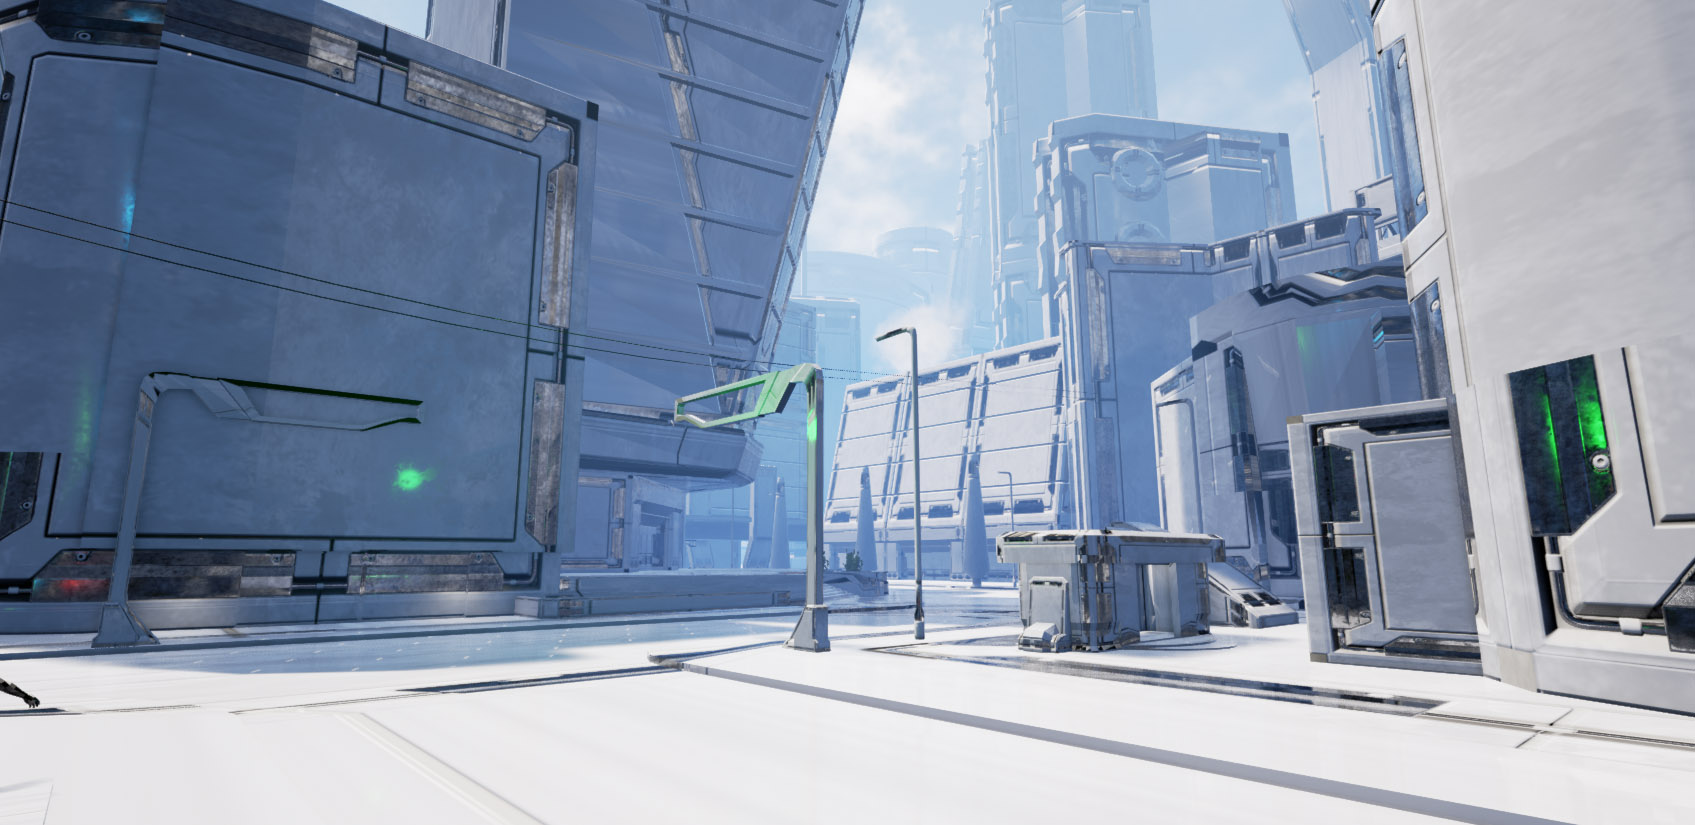
Production
The initial production phase for this environment was in fact the hardest part that I went through. I started to seriously question if I would be able to realize the full blockout in a timely manner. Learning how to work with PBR materials also took a bit longer than I had anticipated.
I initially explored making every building uniquely on top of my blockout, but after working for days on a single building I decided to go for a mix of unique geometry and modular "lego pieces". I made sure all my unique pieces fit the same grid as my modular pieces so I could mix and match different pieces to get more variation easily.
Mood
One of the things that was very clear in my mind when I started this environment was that I wanted it to take place early in the evening and leverage indirect lighting and ambient occlusion more than harsh shadows. With this in mind, the basic mood was one of the first things I set up in Unreal. Some people like to do this at the end of a project and while it might be more time consuming to do it as you go (since you will probably be noodling quite a lot more!), this enabled me to learn Unreal's post processing system much better and in the end I managed to get the exact mood I was looking for.
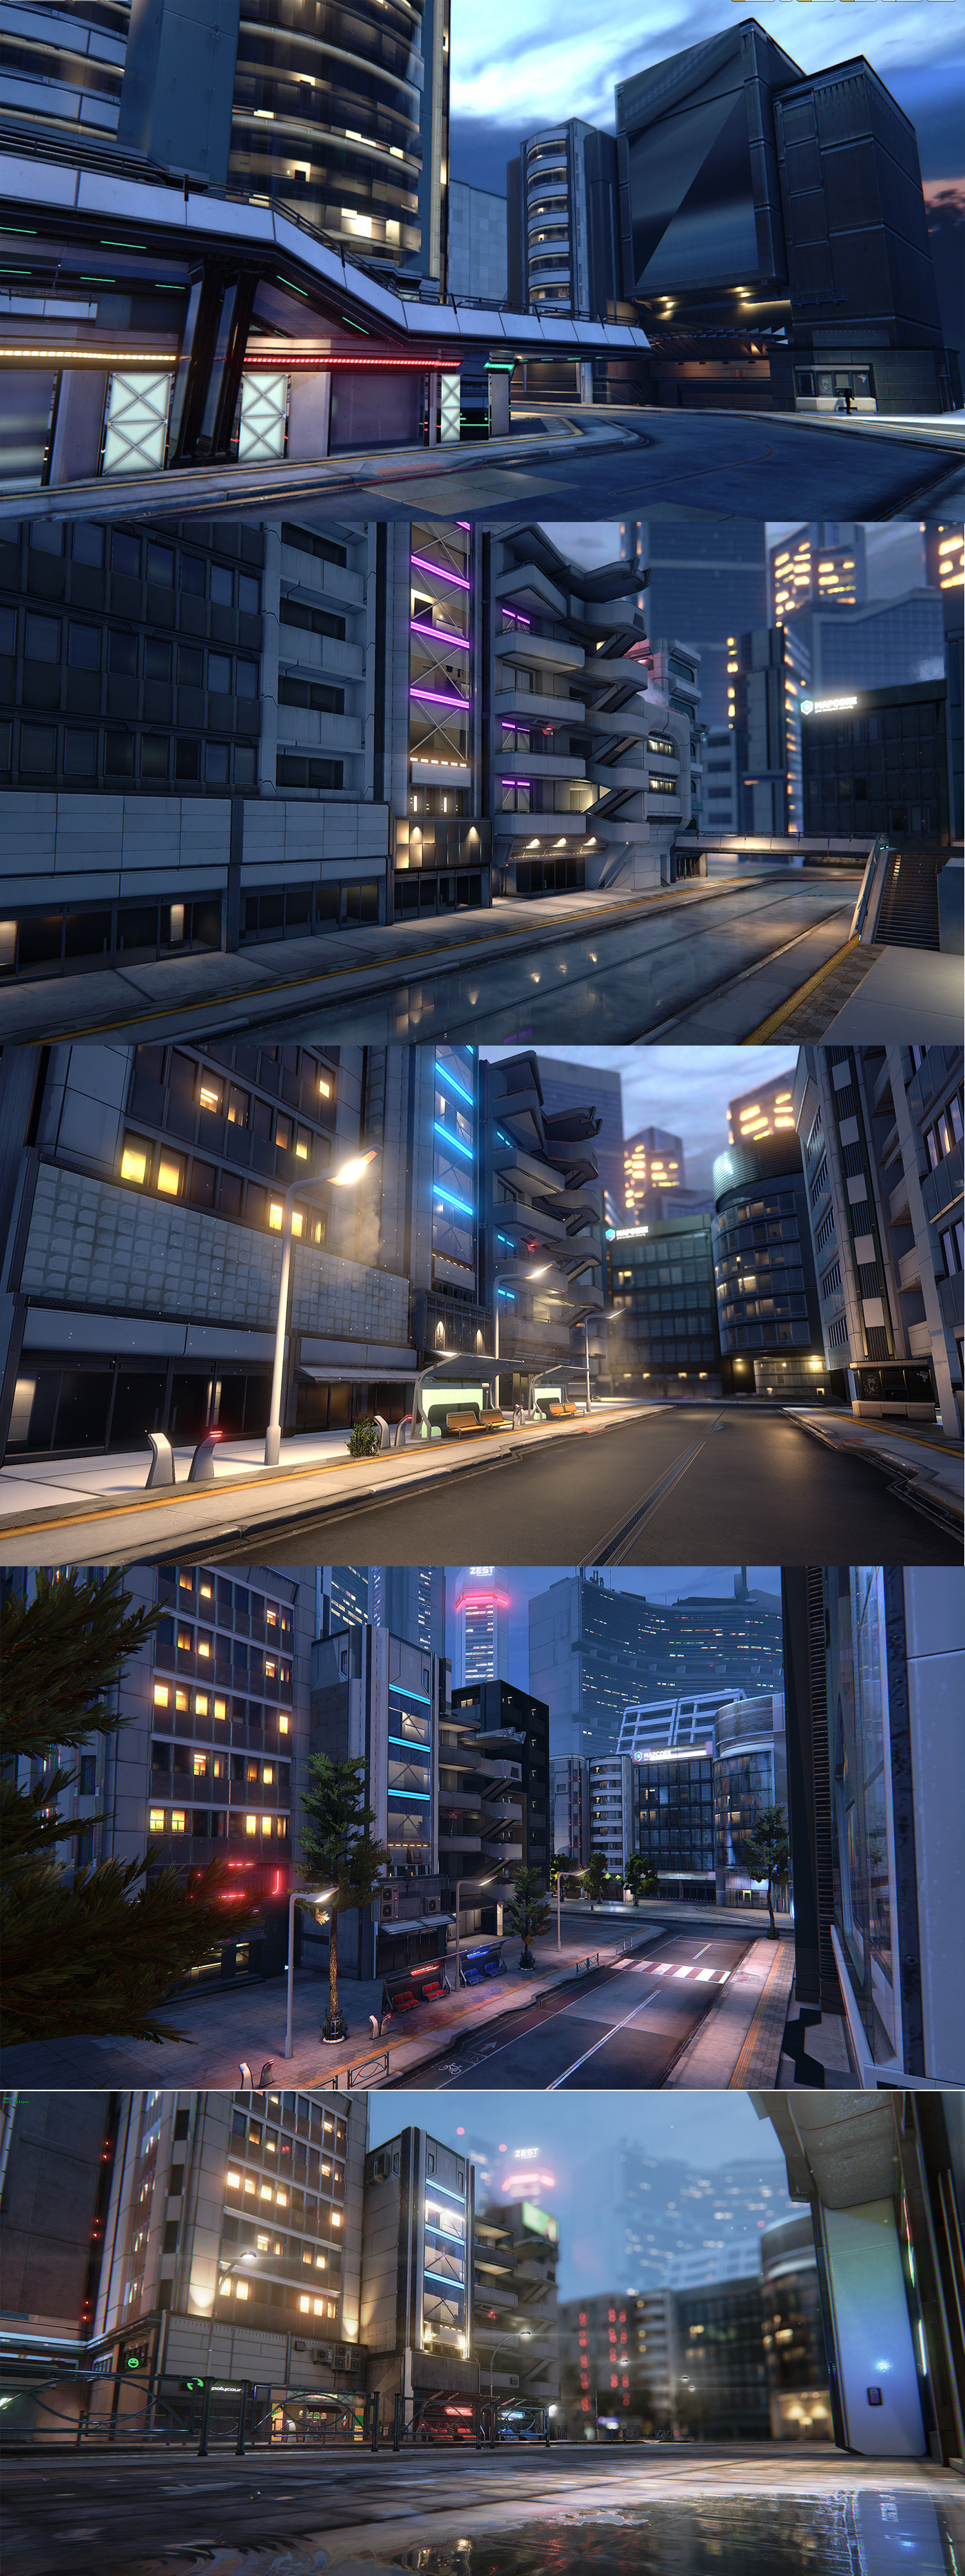
Some of the lighting iterations
At this point I was pretty much certain on what style to go for and how to build this level so I spent the next weeks building modular pieces and small test scenes.
Materials & Textures
This scene makes heavy use of tiling textures, one big generic trim sheet and a few unique textures. I struggled a bit with PBR materials at the beginning (as was expected) but eventually got the hang of it, and while my materials were not looking stellar they did the job for a while…
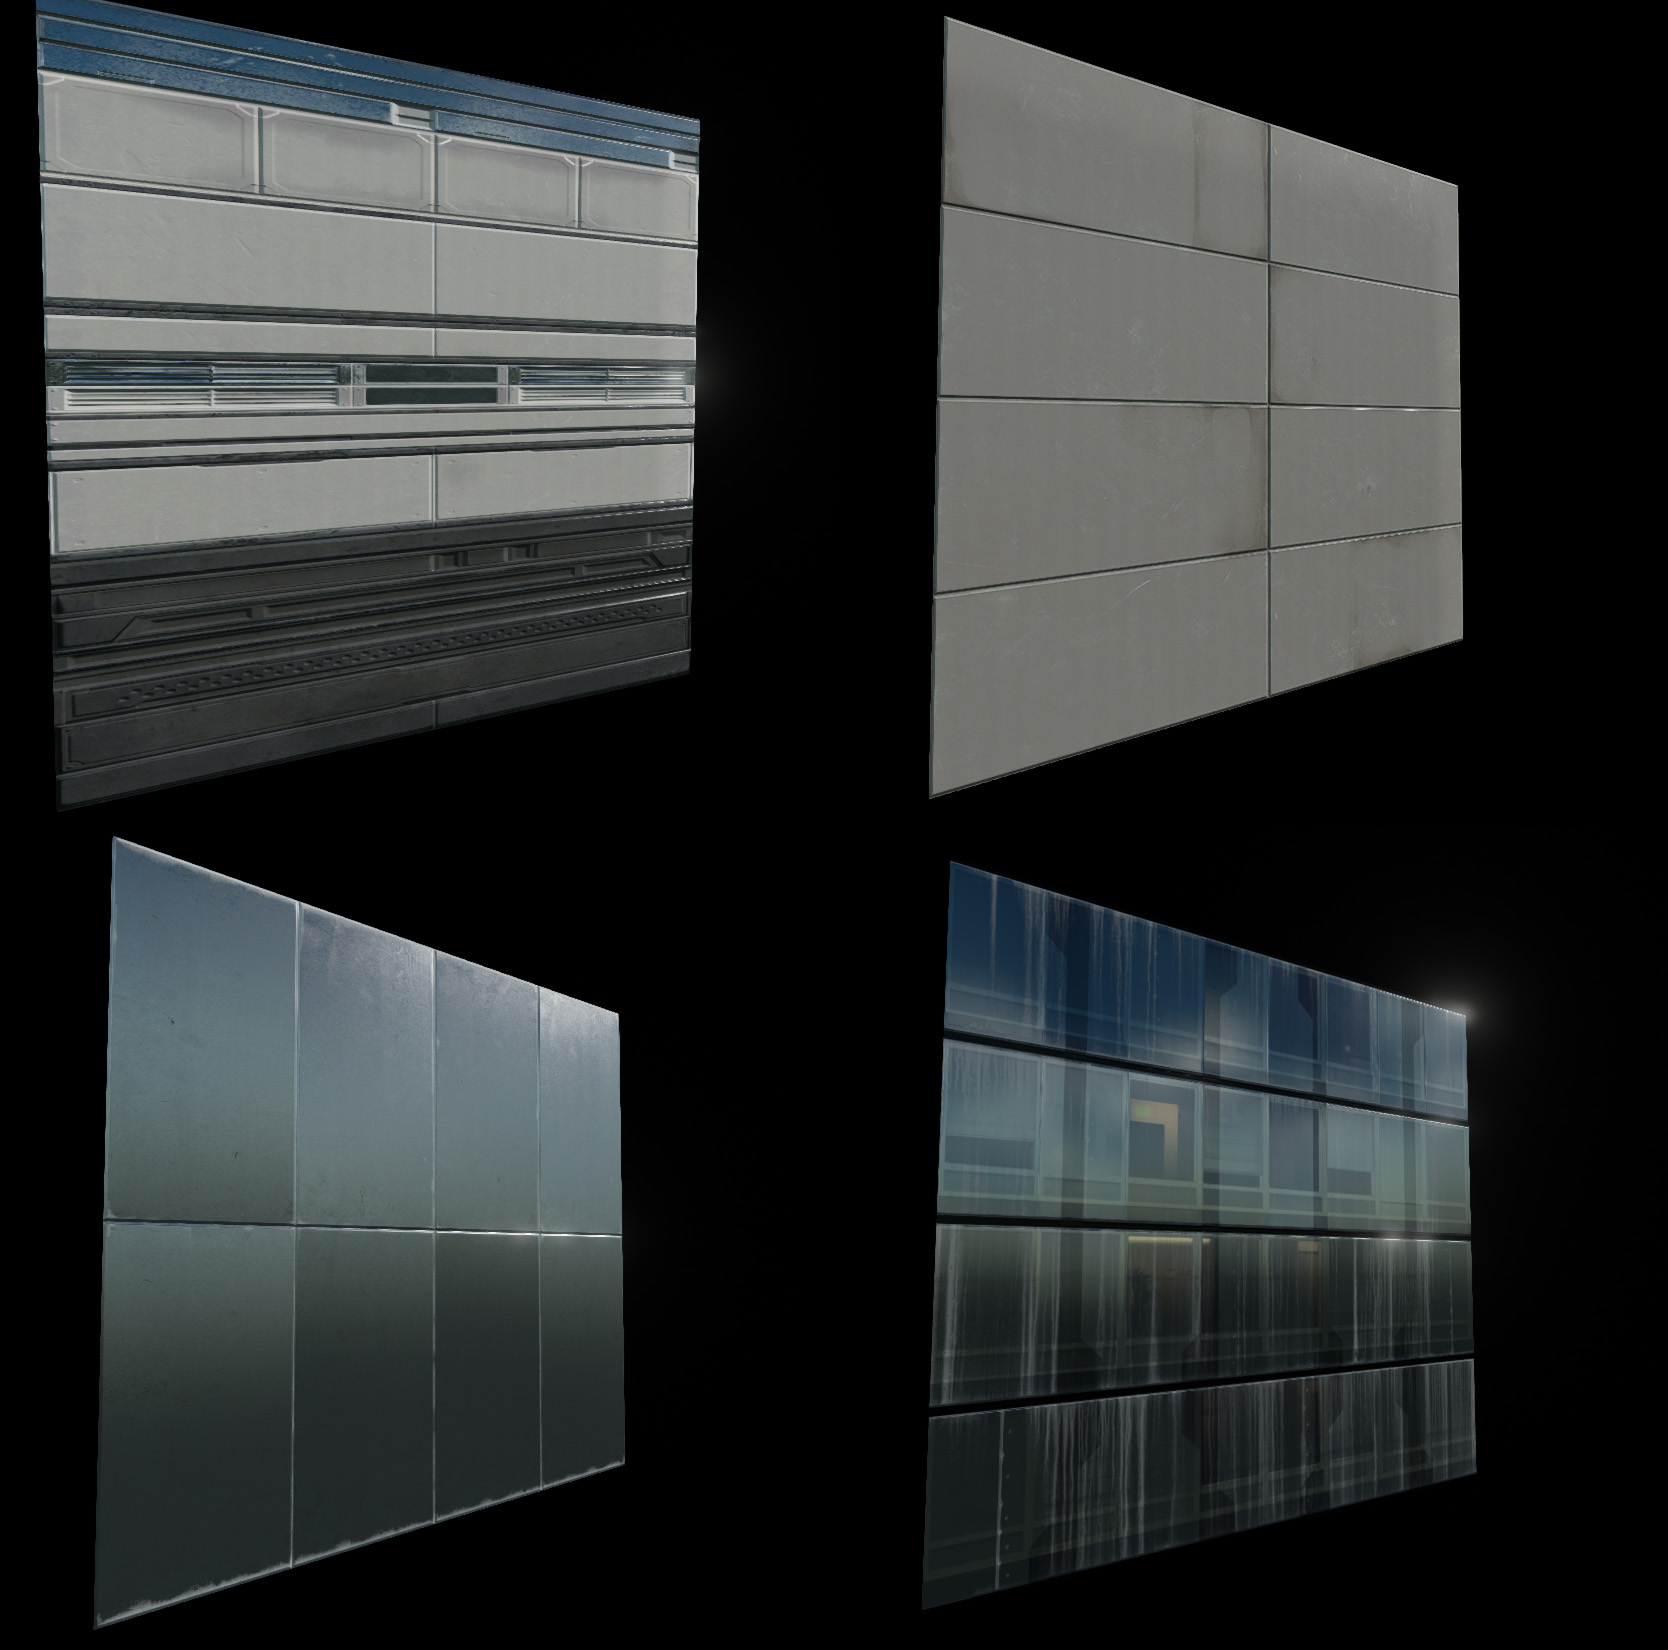
Some material examples
Normal maps were created for each asset as I saw fit. Some of them were baked from high poly models from 3ds max, some were sculpted in Zbrush and some were made entirely with nDo. Normal maps are even more important these days than they used to be, since PBR relies heavily on good normal mapping for lighting. Gone are the days where details had to be faked in the diffuse and specular maps.
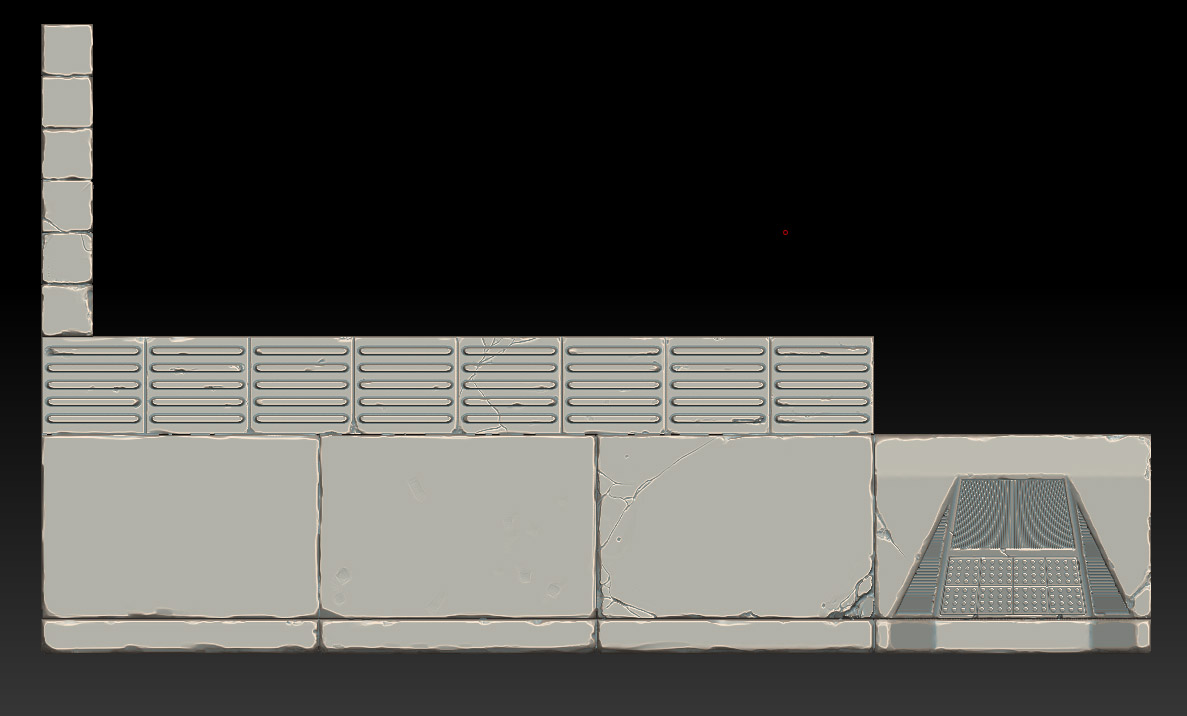
Sidewalk sculpt
At one point I finally decided that my materials were lacking definition and fine detail and started experimenting with the new Quixel Suite tools. I fell in love with dDo immediately because it gave me exactly what I wanted: Great material bases. I could just add my flavor on top of them.
My process with dDo usually goes like this: I create an ID map to define all the different materials in the texture. I then apply a few basic presets (which give you perfectly calibrated Roughness/Metalness/Albedo values) and once I'm happy with the base I add my own hand-painted details. This proved to be a win-win situation, as it made my materials look much more believable and I was also able to reuse 100% of all the hand-painted layers I had done on the old textures.
Tip: You can get much sharper looking textures in Unreal by changing the “Mip Gen Settings” to Sharpen under the textures’ Level Of Detail settings (double-click a texture map to access this).
Working with PBR can be pretty daunting, especially when it comes to metals, so I definitely recommend exploring dDo or some other automatization tool for texture production, even if you have to tweak them heavily to match your style.
Material Instances
One of the best features of the Unreal Engine is that you can create Material Instances very easily from regular materials. These instances are much easier to work with and save you a lot of time setting up new materials since you don’t have to build a node network everytime you need a new material. One extra benefit of using Instances, is that you can also fine tune your materials much faster because changing instanced parameters don't force a shader reload, whereas saving a regular material does.
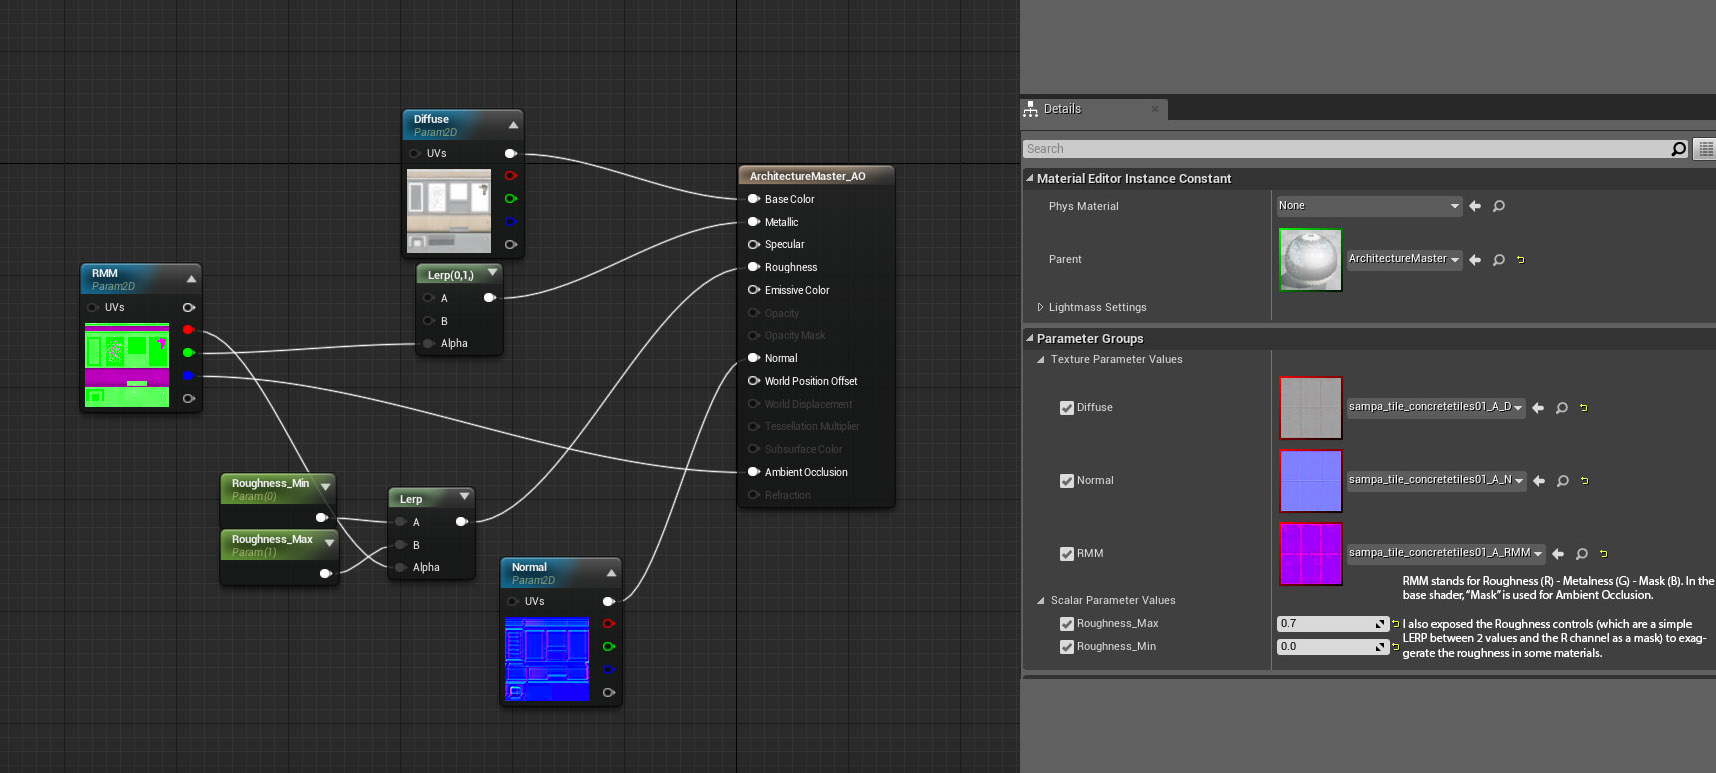
A simple material with Albedo, Roughness/Metallic/AO and Normal map support. Original material on the left vs material instance on the right.
I didn't want to create one big material to fit all my needs (not very performance friendly), so every time I created a new material type I also made sure that it could be used for instances.
Some of the material bases I created
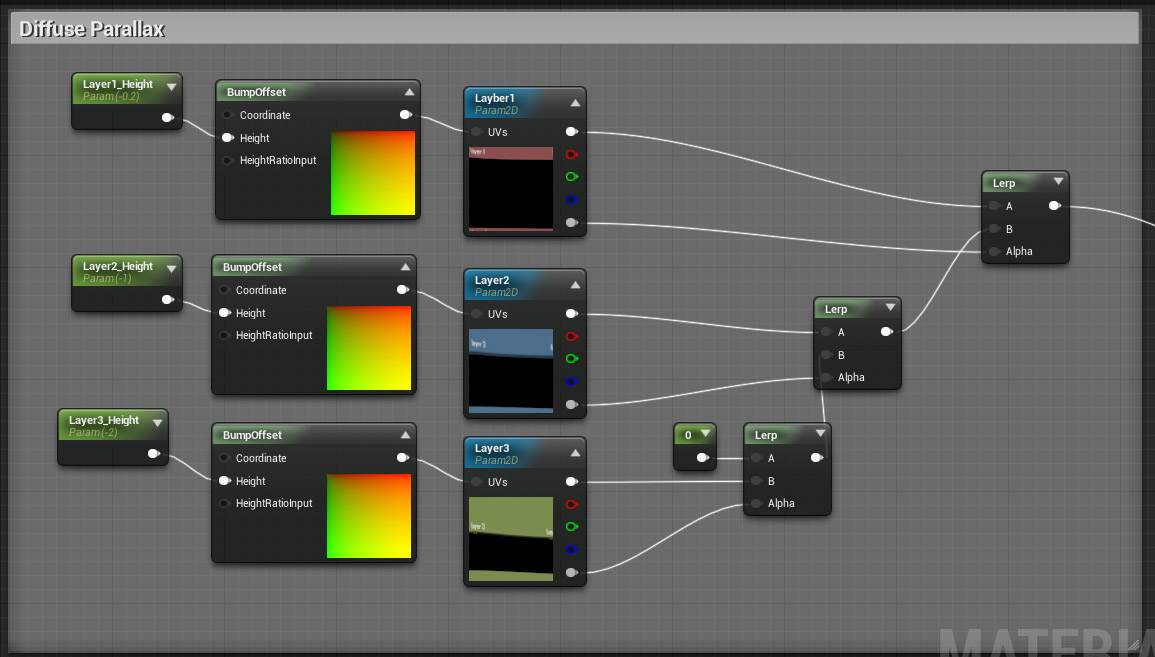
Architecture_Parallax_3Layers: A material with parallax mapping support, mostly used for windows.
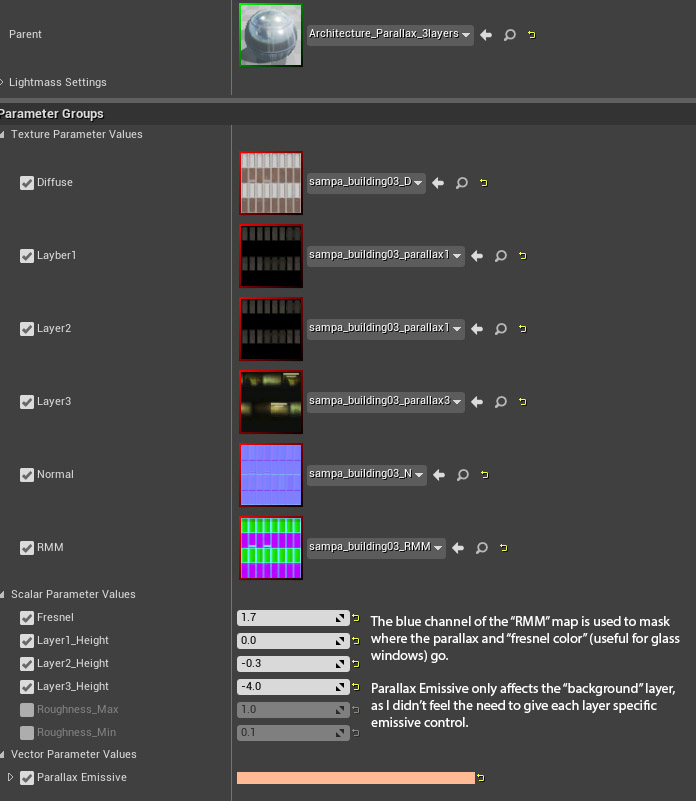
The actual Parallax node network is pretty simple:
Asphalt: This special material uses World Space mapping with a "stain" texture multiplied on top for large scale details. This material was later reused on a "Wet" version (described below) for the roads.

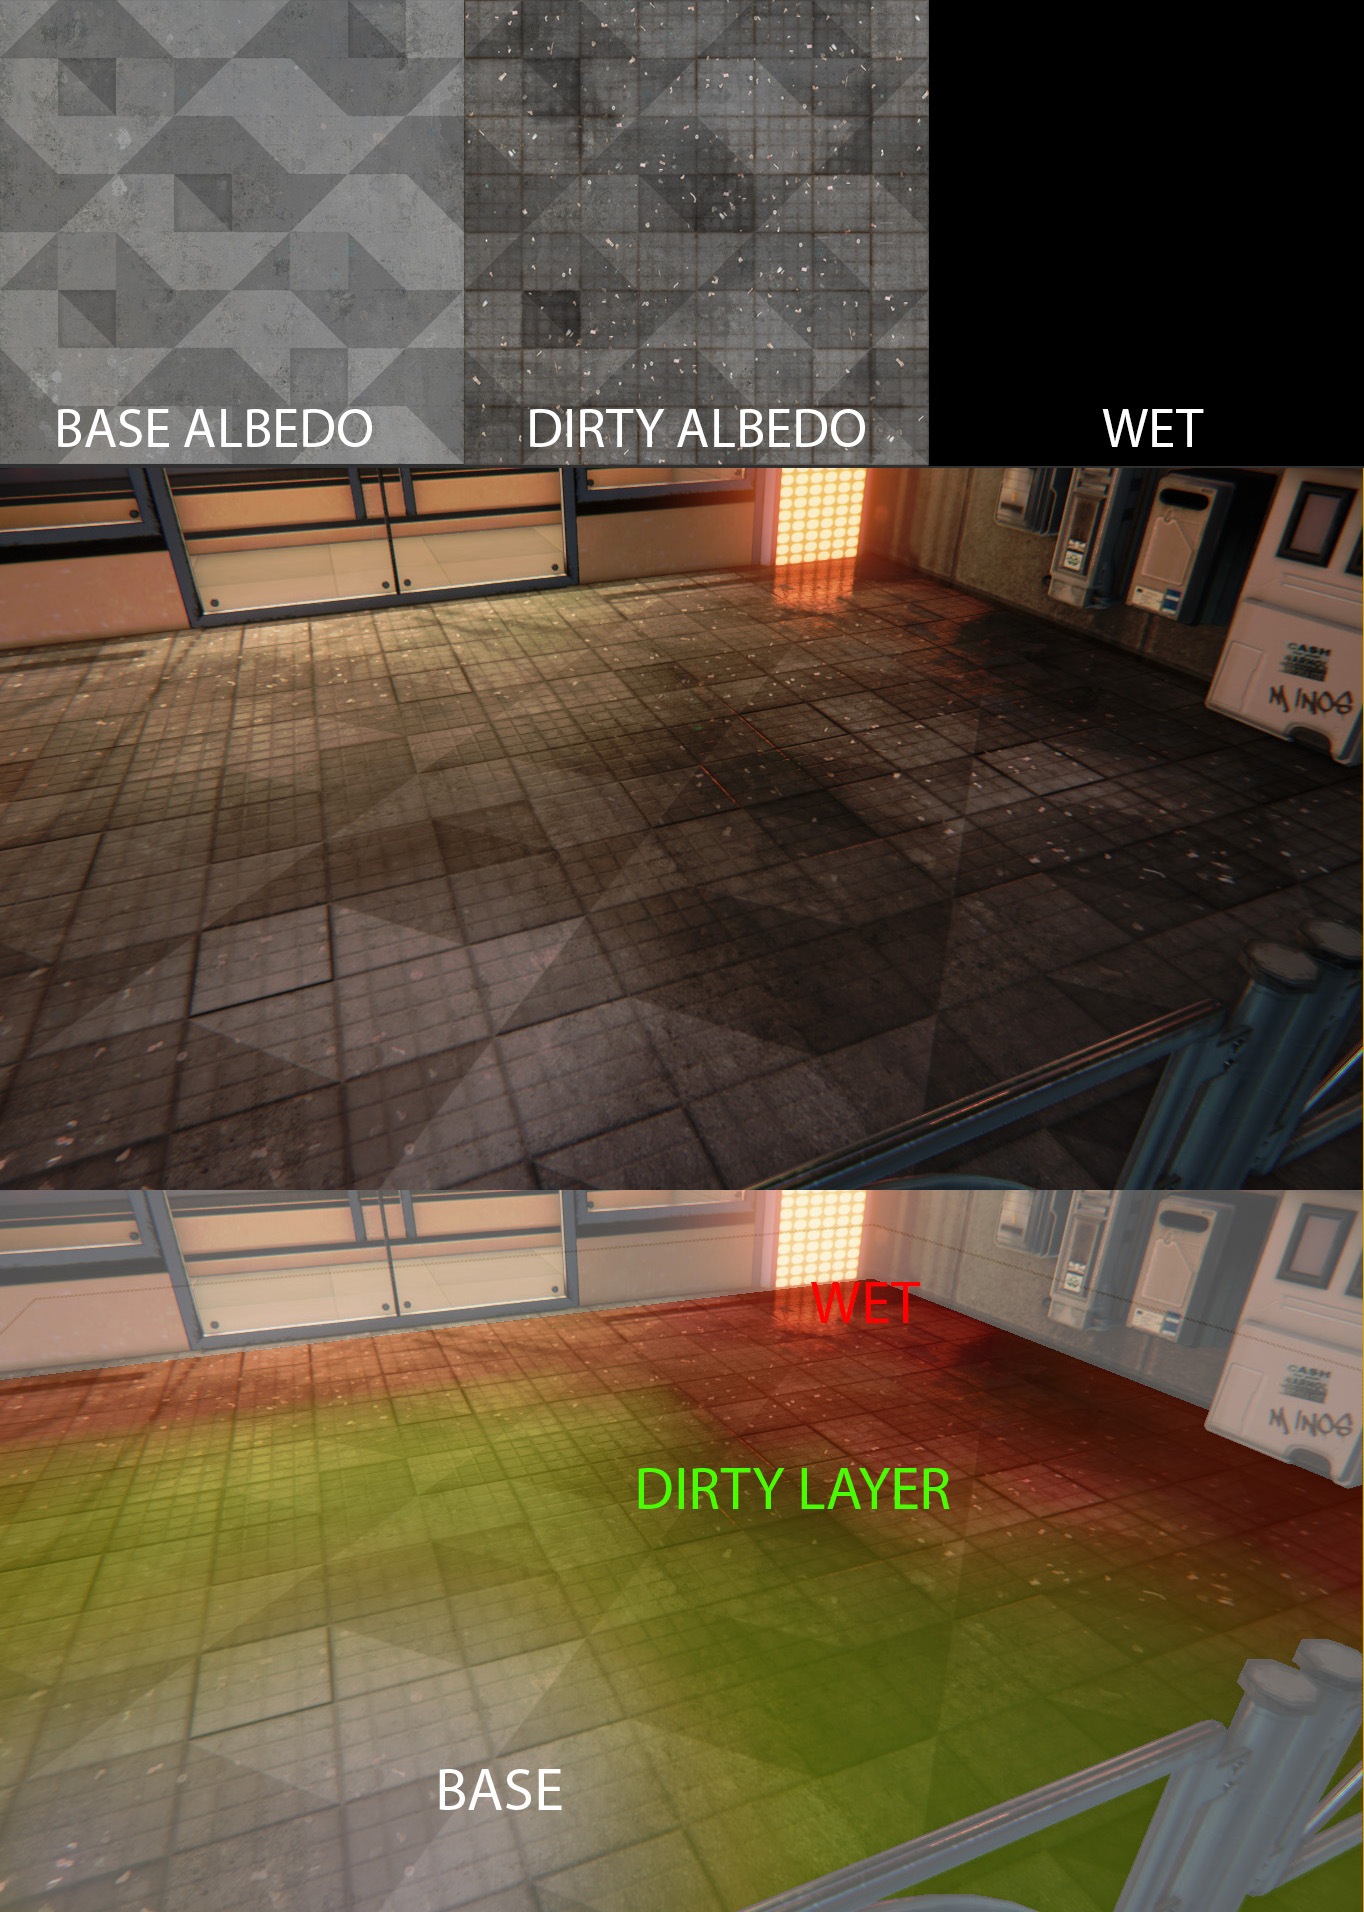
Architecture_Wet_Dirty: This material uses vertex colors to blend the base material with two other materials: A "dirty" version of the albedo map and a flat 100% reflective material (to simulate water puddles). Explaining what each individual node does is beyond the scope of this article so I'll just leave the shader network here:
The wet material in action:
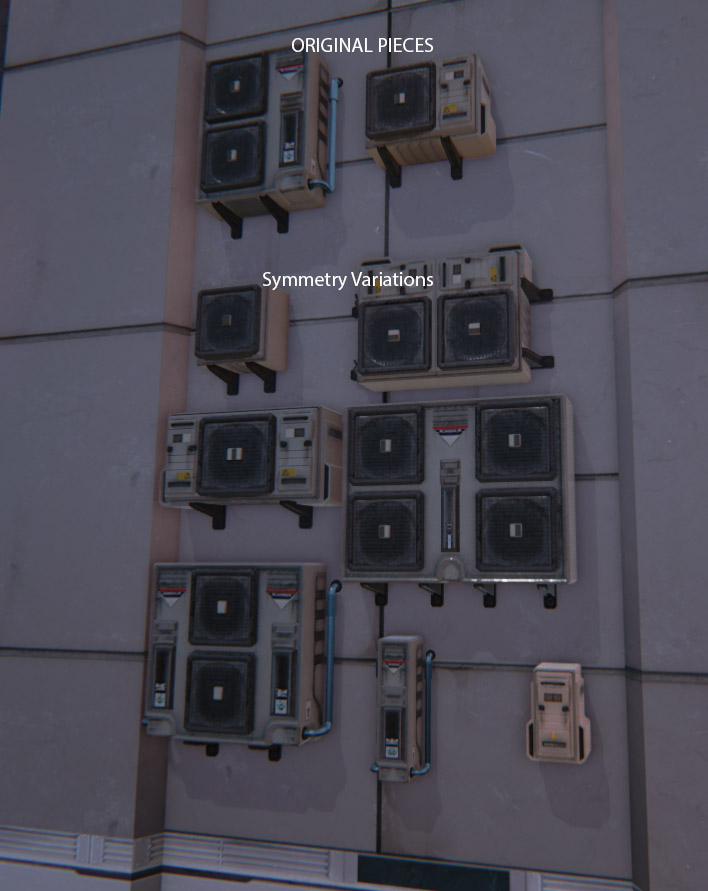
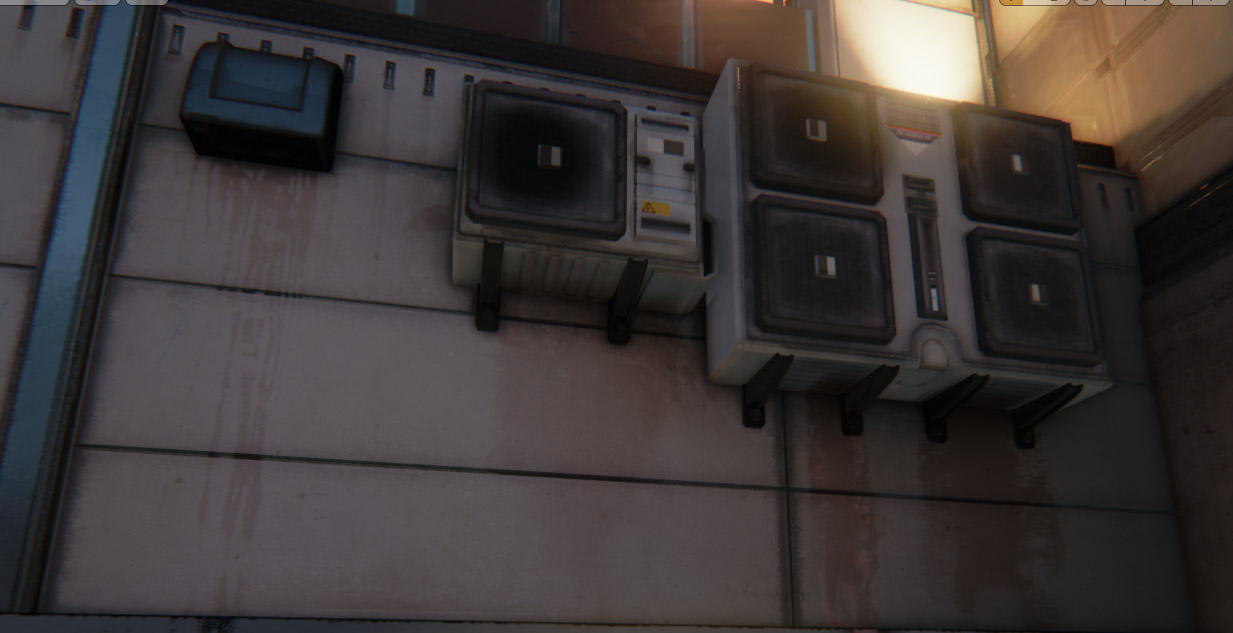
Creating Variation With Symmetry
You can create lots of variations quickly using symmetry. The AC kit consists of two base pieces and several variations created with the Symmetry modifier in 3ds Max. This is the same as MirrorCut in Maya:
I also used this trick to make more variations out of this Storefront:

Lighting & Post-Processing
To light this map I used standard lightmaps. While making fully dynamically lit environments in Unreal 4 is a possibility I found that the performance loss is not worth the time saved by not baking lightmaps.
I kept the lighting simple, contrasting small "gold" light sources with the ambient blue color. Instead of lighting the level as a whole, I created several "small" scenes. This makes the level look less "art directed" and more like a real city would. I also placed some strategic light sources to highlight the wet look in some areas. While I imagine this kind of "wet" look will be abused until everyone hates it in the future, I kept it very simple and restricted to where it made sense and would look good.
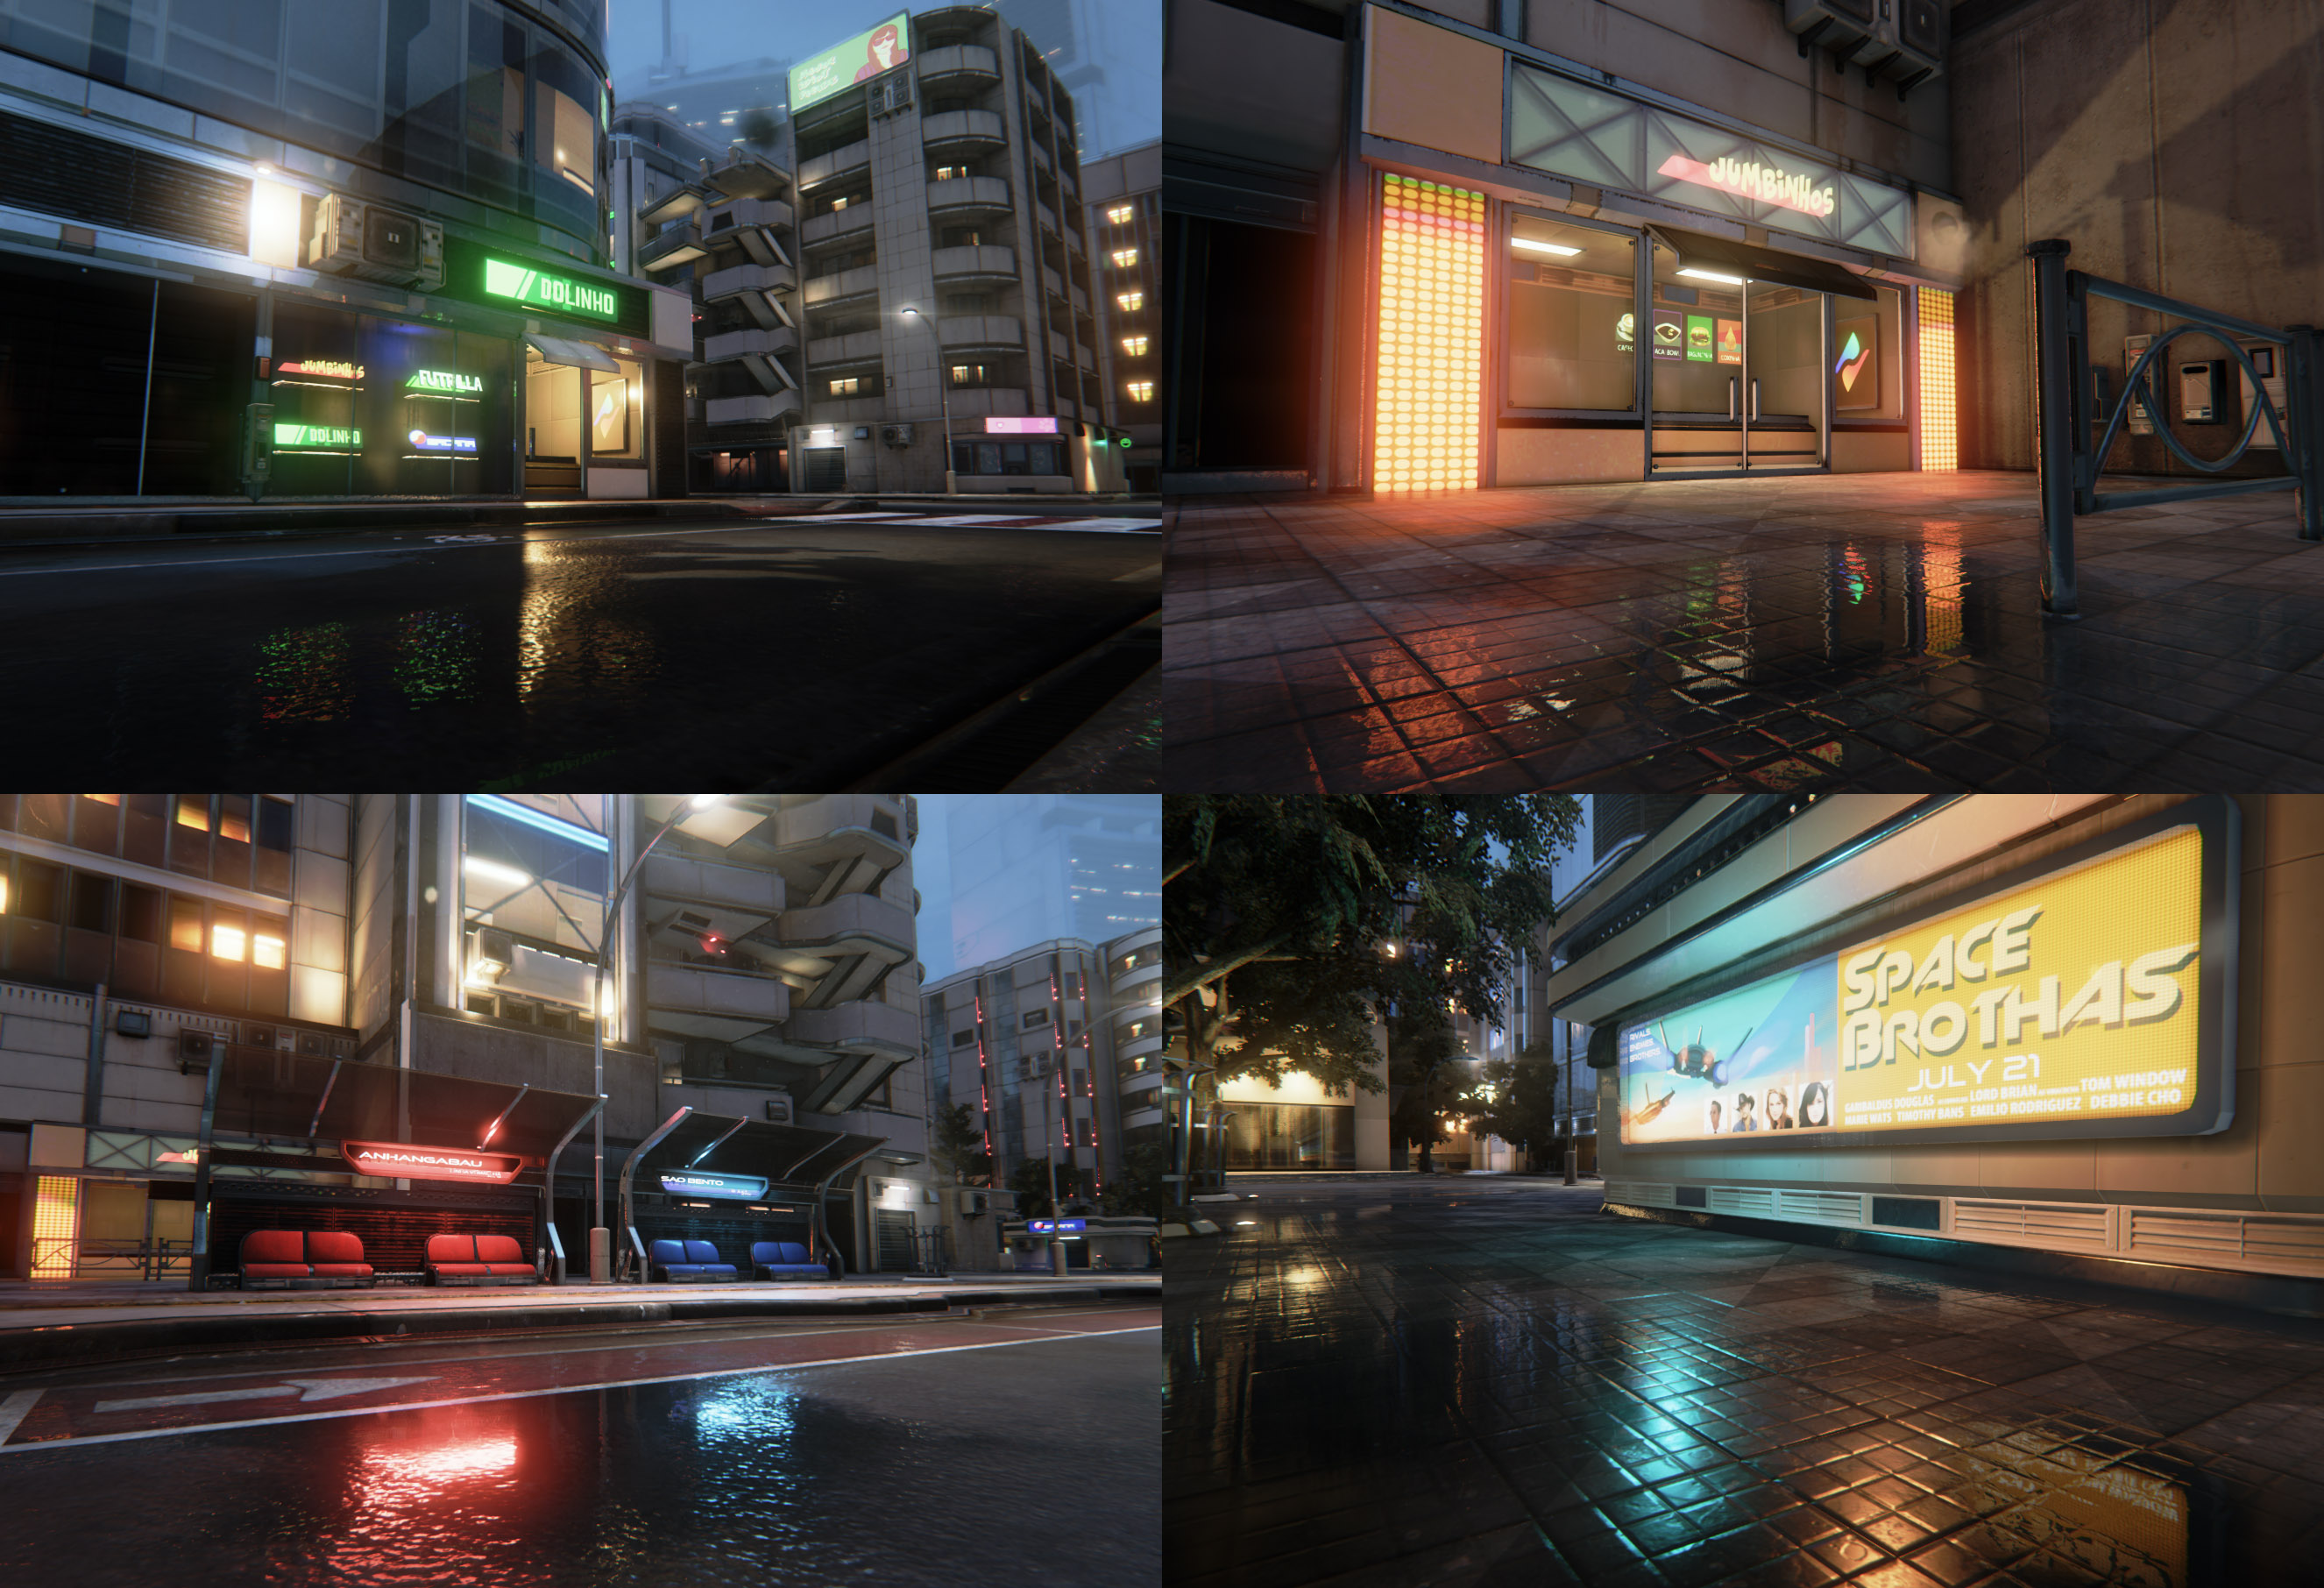
Carefully placed water puddles close to strong light sources
When it comes to Post-Processing, I like to keep image adjustments outside the engine to a minimum. I really took the time to tweak the exposure values to get a good range of details in shadows and also to avoiding bright areas being way too bright. This can be accomplished by a combination of tweaking exposure and Tint/Contrast settings under a Global Post Process volume.
One of the last steps to finalizing this scene was to bring a few screenshots into Photoshop, tweak the levels and saturation values until they were exactly what I wanted, and then create a lookup table for the color correction. However, for some reason I was getting horrible banding with the color correction enabled, so in the end I just placed my screenshots from Photoshop next to the viewport and tweaked the post-process values until both of them looked exactly the same.
Wrapping Up
This is the 10% part of the process that makes everything look 200% better. During this phase, I created small interest areas and dressed them with props, particles and decals. I also scavenged several pieces from unfinished scenes and from my initial blockout. One of the examples is the News Stand which I just polished the geometry from the blockout and applied final materials on it:
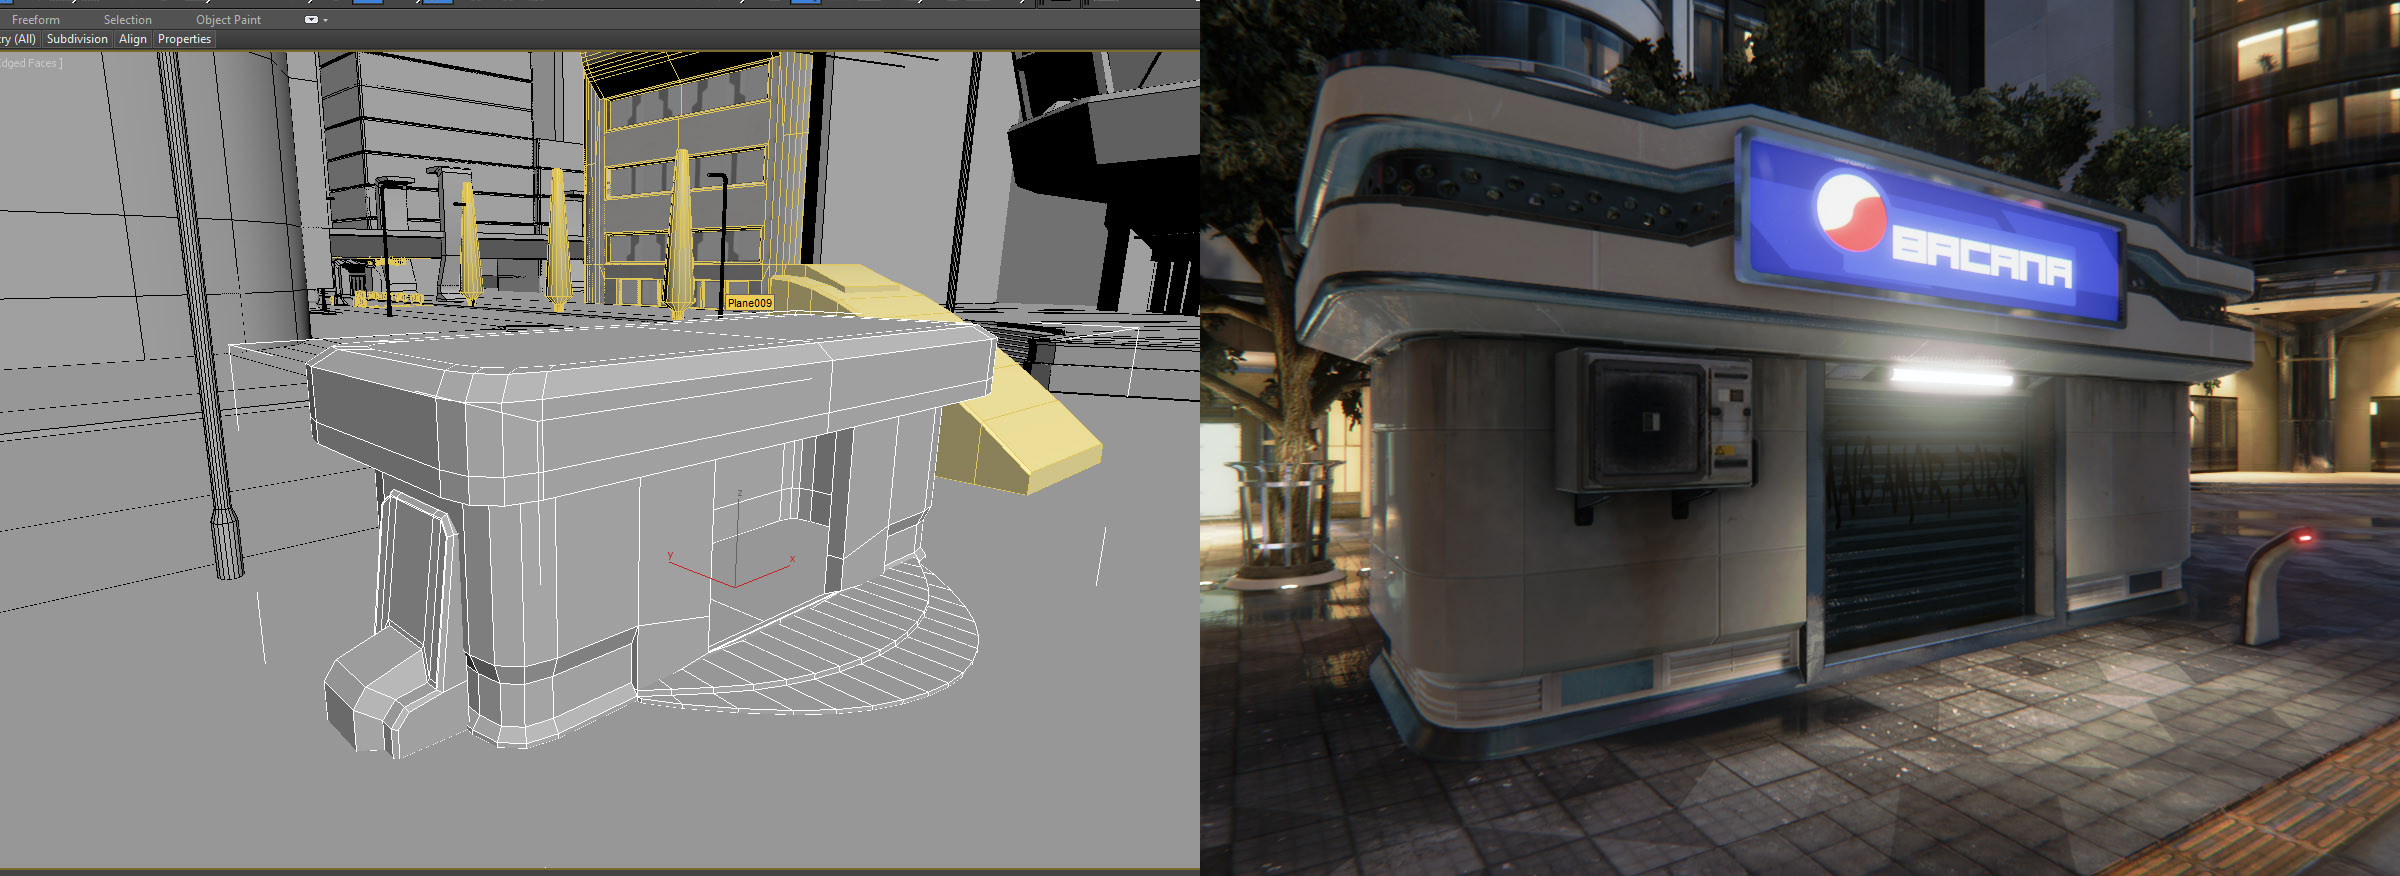
Again, never discard any ideas/assets, you never know when they might come in handy!
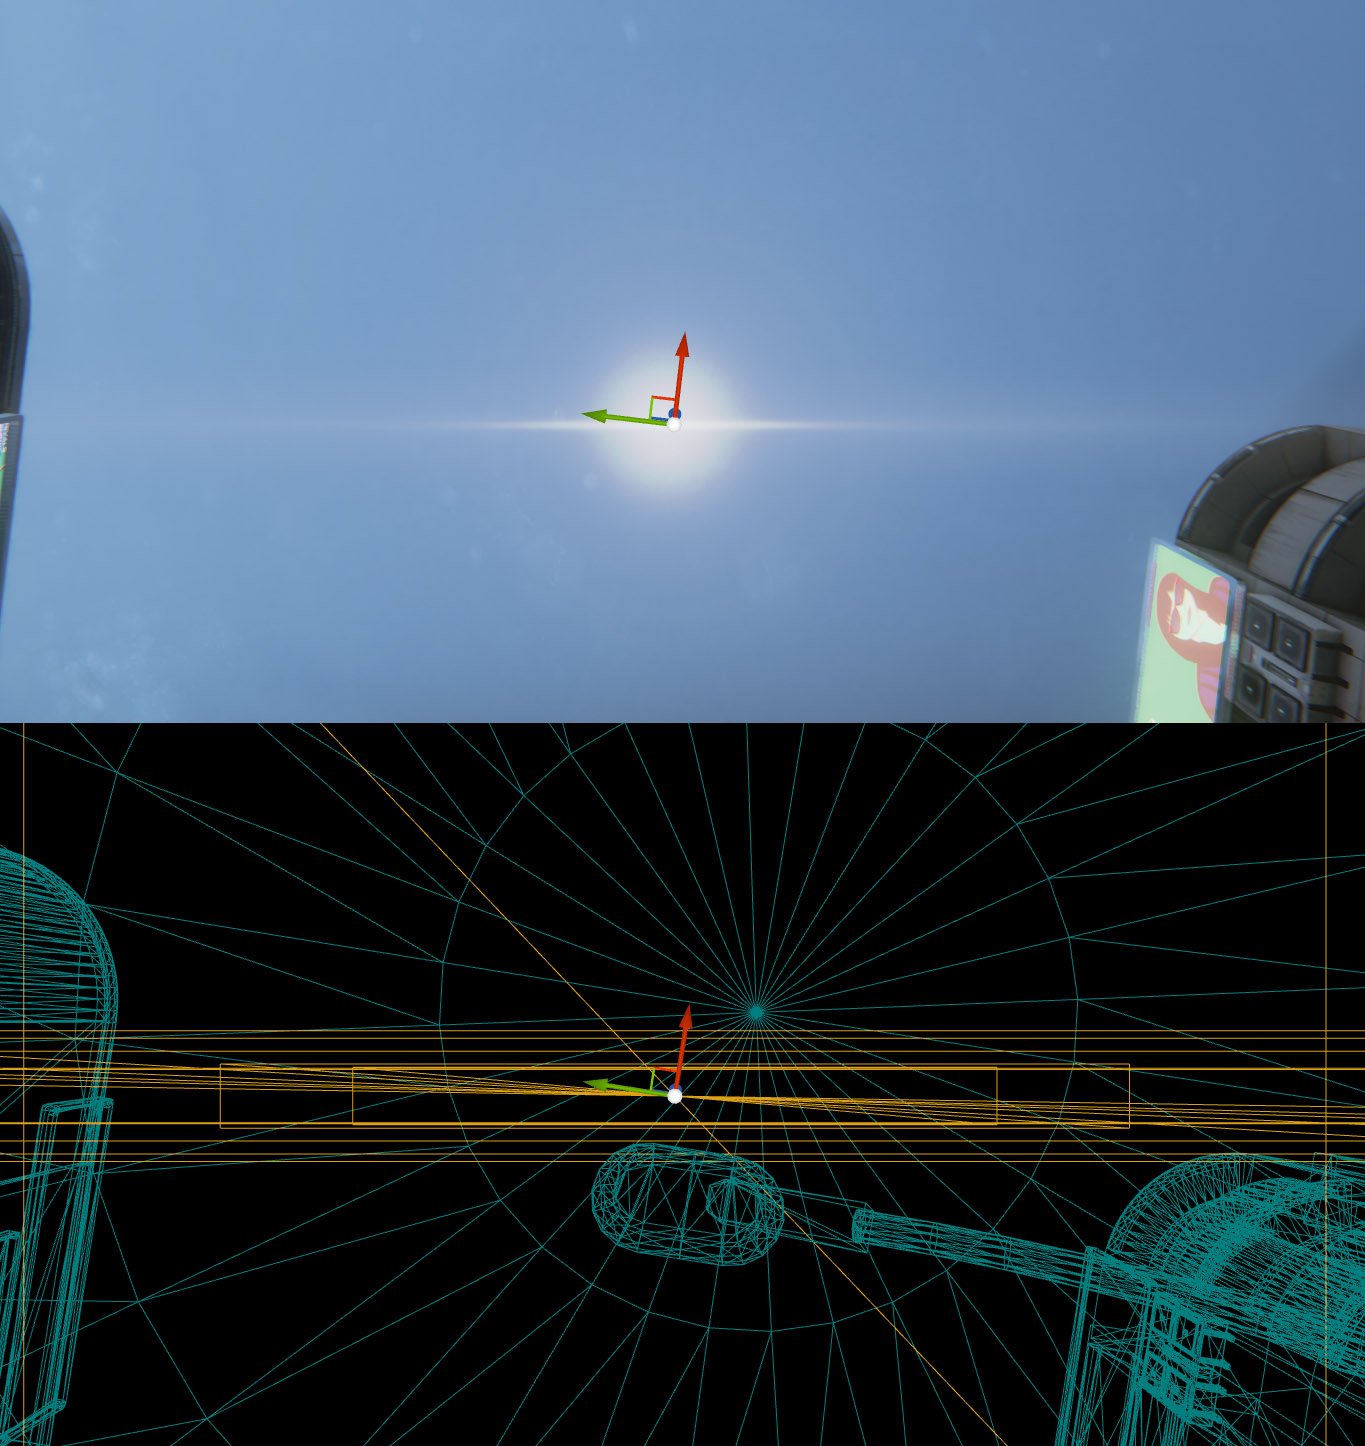
The light glows are simple particle emitters consisting of two emitters: A regular "round" glow and a horizontally scaled one to simulate anamorphic flares.
Example of decal usage:
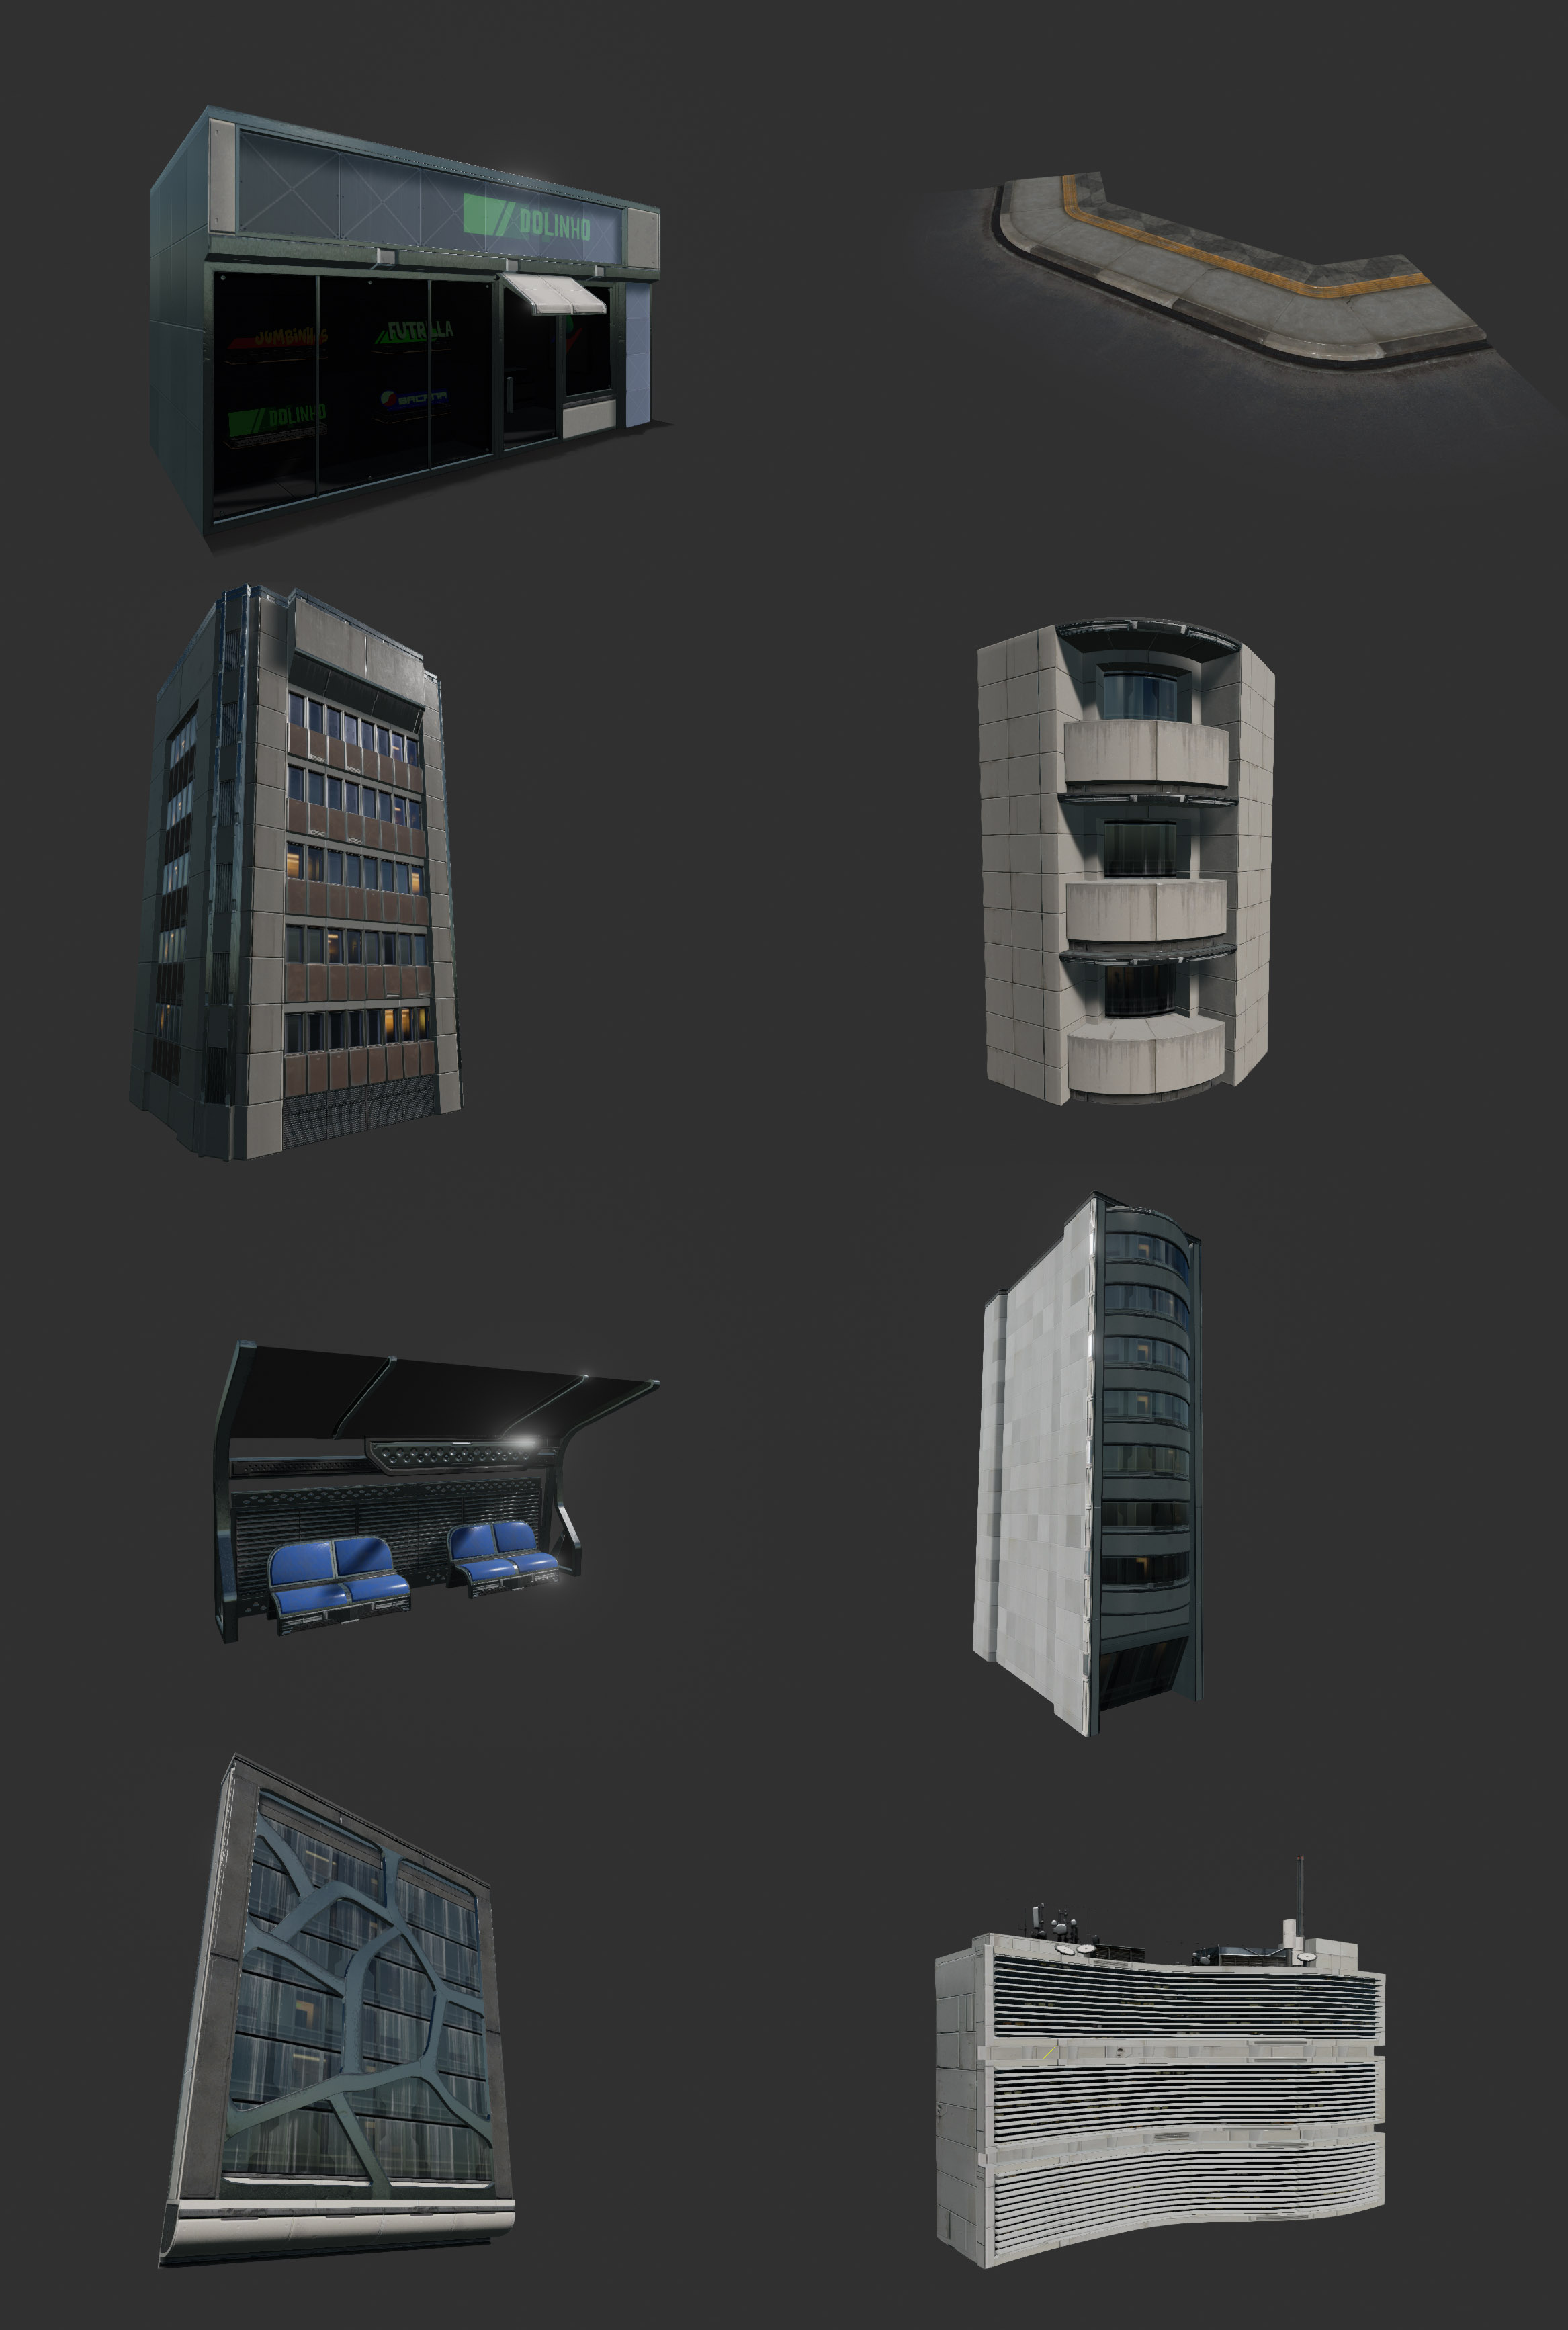
Some of the pieces used in the level:
Now that was a very detailed break down. I’m sure people will really benefit from the information you just shared. Thank you for that! In the beginning of this interview you said that you learned a lot of lessons during the production of this scene. Could you share those as well?
Yes, I learned quite a few lessons with this project. Namely:
- Never underestimate how much time consuming it is to make game art. My initial blockout turned out to be way too ambitious for the amount of time and resources I had for this piece.
- Never discard any ideas! Several pieces I made for the blockout level were actually polished later on to be used in the final level.
- Don't try to find a one rule that fits all when it comes to asset production. As long as you work with reasonable dimensions that adhere to the grid you can mix unique and modular pieces easily. The same applies for using Unique or Tiling textures, find a balance to use either where it makes sense.
- Don't think twice about pausing work on something when you feel you are noodling too much or if it isn't going anywhere. It's usually better to trust your instincts than trying to make up for the "wasted" time by forcing yourself to finish it.
- Don't be a dinosaur and embrace progress! My initial reason for not using dDo at first was because I thought that all my textures would look the same but this is not the case if you use it wisely.
- A texture artist needs to be versed in several different tools to get good materials. Don't stick to just one, explore all options to find the one that’s best suited for each specific situation.
- There's no such thing as wasted time or wasted work. Even if imperceptible at first, every time you work on something you are making progress towards being a better, more experienced artist. Most of the time this means working on "failed" projects. But if you really think about it they are not failures at all as we learn both from mistakes and from the things we get right. Several ideas that I spent hours and hours on didn't make it to the final level but that's fine. In the end, they gave me a broader perspective at environment creation which enabled me to make the right choices towards the end of the project.
- Fun fact: I've been trying to make this environment for over a year now, exploring several ideas before. I'd say this is the third iteration of this idea and the good thing is that in the end, with a bit of polish, I managed to use most of the stuff I made for the previous iterations.
- This is a bit cliché but very important: Don't be afraid of making stuff. Work on a lot of crap and only show what's worthy showing (usually a small percentage of what you make). That's the only way to find your own style and gain confidence in your abilities.