
Maya > Unreal 4 Modular Kit Workflow
Working with modular pieces and exporting one by one can be a pain in the ass, especially when you want to iterate fast and use custom collision models. I did a bit of research and after trying a few different scripts, I found one that's simple and powerful that does the job perfectly. Thanks to Chris Cunningham for the script!
INSTALLATION
Download the latest version on his github page (make sure to go to the versions tab and get the latest one, otherwise you might get errors). Alternatively, you can download version 1.01 (the one I'm using now) here.
The installation is pretty straightforward, drag and drop the files to your "documents/maya/version/" folder, restart maya, enable the appropriate DDConvexHull plugin in the plug-in manager and create a shelf button with these python commands:
import pbUDK
pbUDK.UI()
For more information on the script itself please refer to the readme file and the github page
WORKFLOW
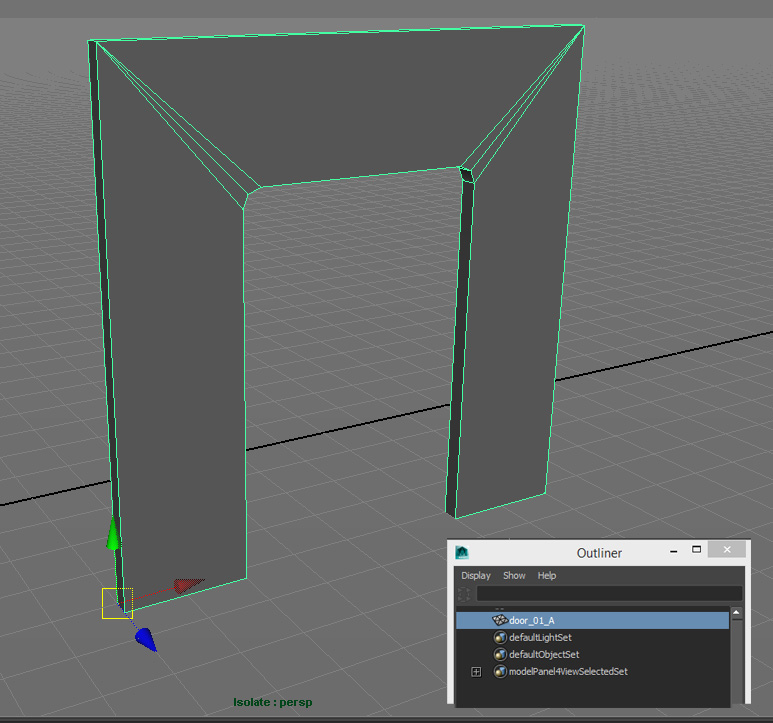
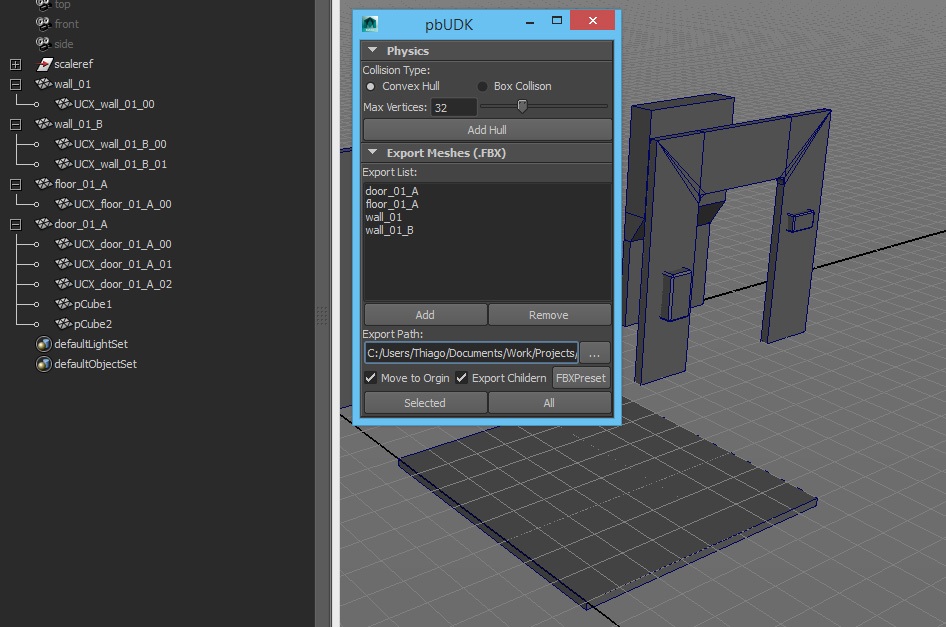
As an example, I'll start with a simple mesh of a wall with a door hole. Make sure the pivot is placed in the desired position and that you name it properly in the outliner. I named this guy door_01_A.
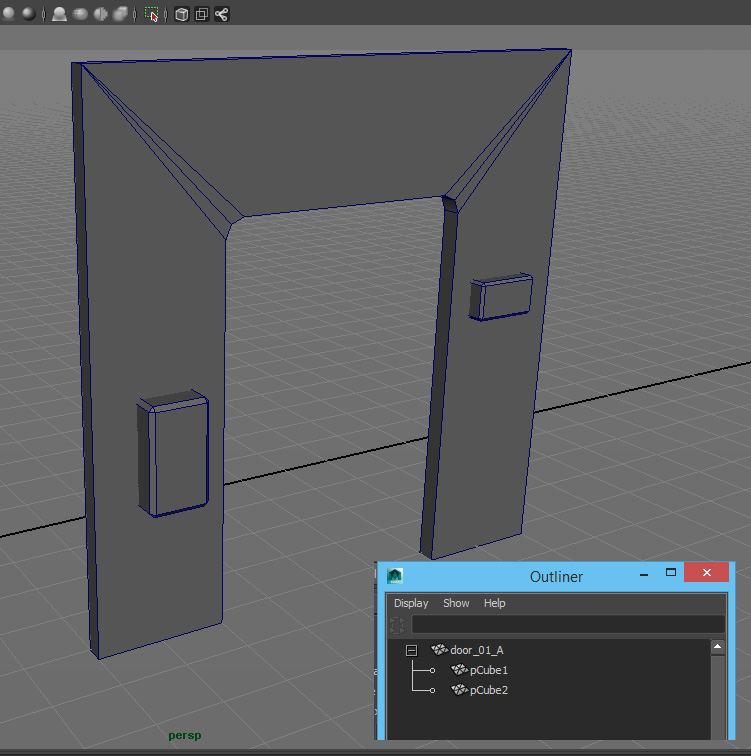
One of the great things about this script is that you don't have to combine objects before exporting, as long as they are parented to the main mesh in the Outliner they will be exported as one. I went ahead and added two addons to the door, which were kept as separate objects:
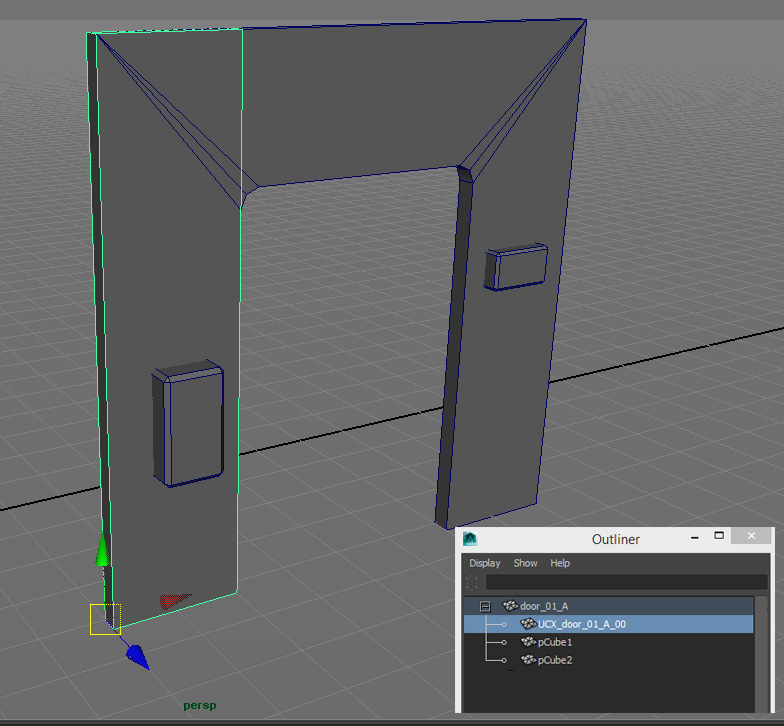
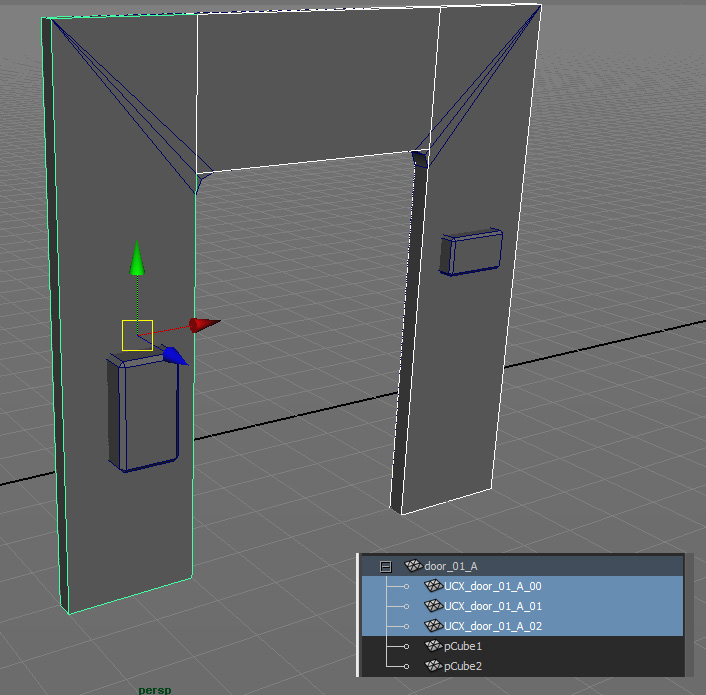
Now let's create the collision. Before proceeding, I recommend reading the official Unreal documentation so you know the ins and outs of collision creation. As a rule of thumb you generally want to stick to boxes and simple models. In this case I created a box and named it UCX_door_01_A_00. Before I duplicate this mesh around, I parent it to the Door and also add it to a new layer called Collision, this way I can hide or show collision models with one click.
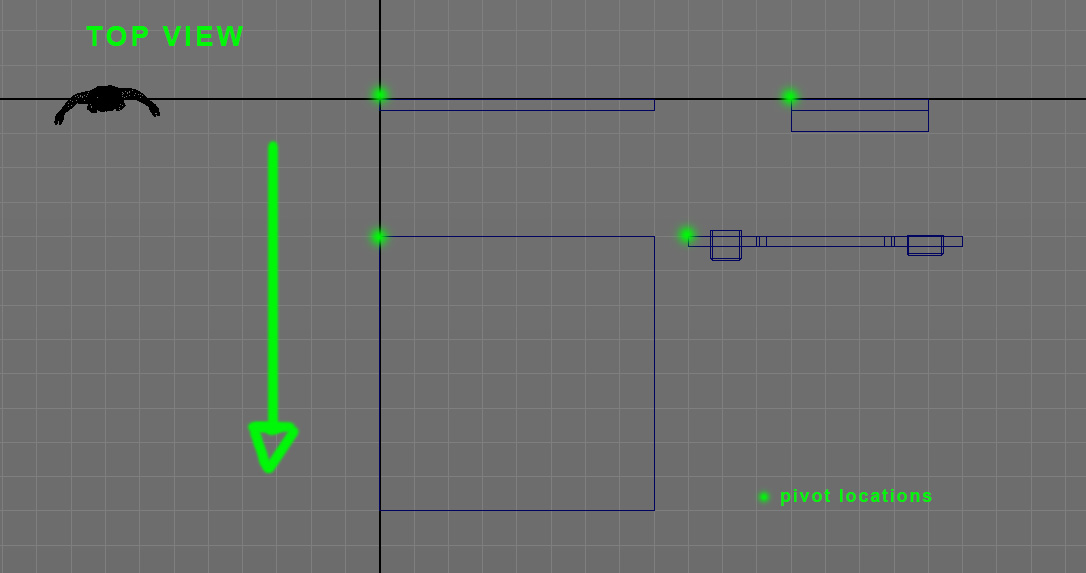
Protip: Make sure your objects face the correct way before proceeding further. To do so, go to the top viewport and make sure they face this direction:
Now open pbUDK, change the export path and add the meshes you want to export. Make sure you select the parent and not the child before adding. In this case I also added a few other meshes, each with their own collisions. Before exporting, I recommend creating a new FBXpreset file and assigning it to pbUDK. This can be done by clicking on the small box next to "Export All" in the file menu, and saving the settings to a file. For Unreal 4, I turn off all settings under geometry and keep only Smooth Mesh and Smoothing Groups on. If you don't want to screw with this, there's an fbxpreset file included with the script that you can use.
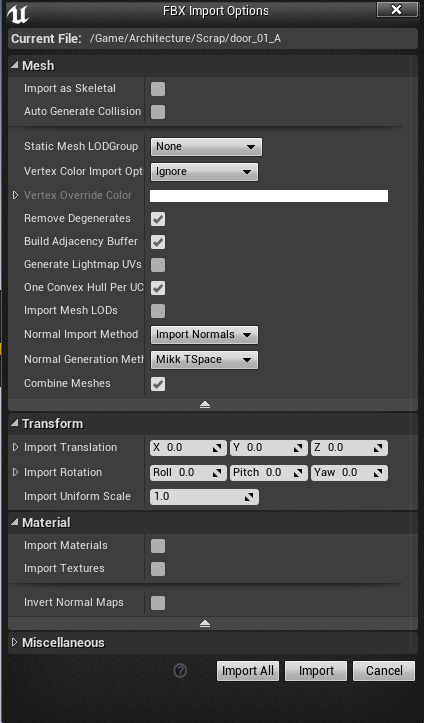
Next import all in Unreal 4. Here are my settings but feel free to change these as you see fit:
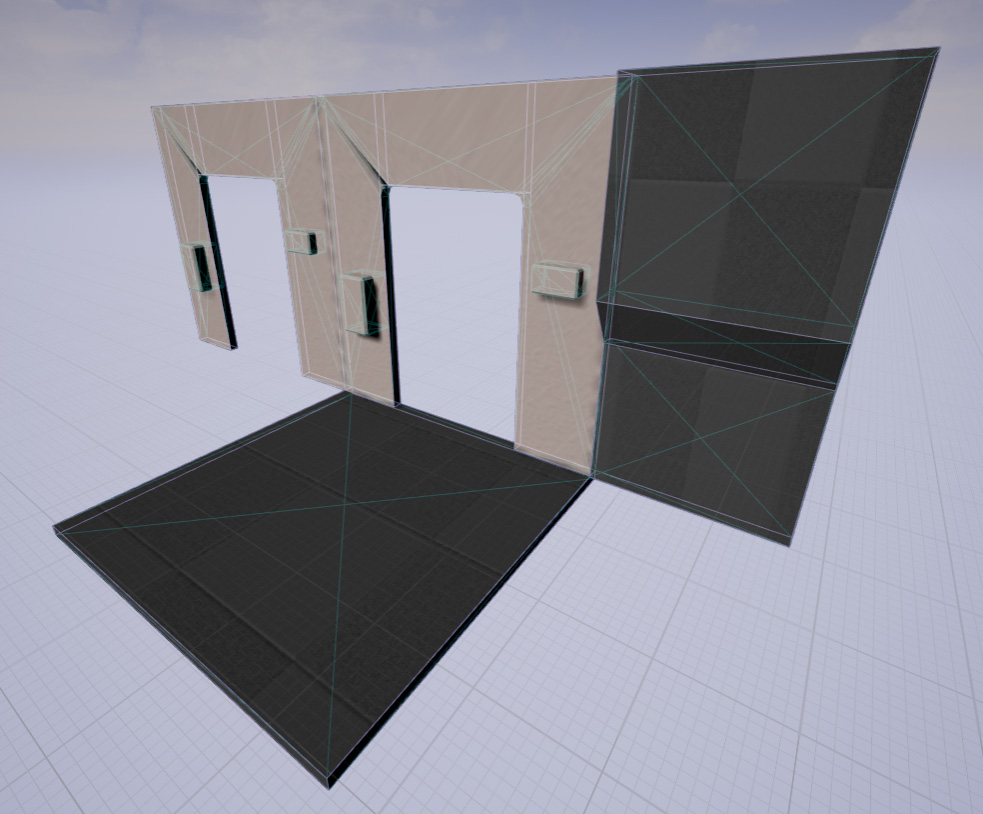
If you did everything right your meshes should all be properly named and have their respective collisions. So beautiful~~
Got any more batch export workflow tips? Shoot me an email!