Quickly Baking Normal Maps in Xnormal
Introduction
This tutorial should be pretty trivial if you have some experience with xNormal so it's aimed at people who still bake their tiling textures in their 3D software. There are many reasons why you should use xNormal instead:
- It gives much more control over the final look of maps
- It renders much much faster than 3ds max
- You don't need to fiddle with 3ds max's convoluted render to texture tool
This tutorial is aimed at baking simple tiling meshes to a plane, so it's not necessary to use cages for this.
Asset Preparation
I always model my tiling textures using square dimensions, such as 512x512 or 256x256. This way my final texture maps will also fit on Photoshop's grid (this can prevent headaches later on).
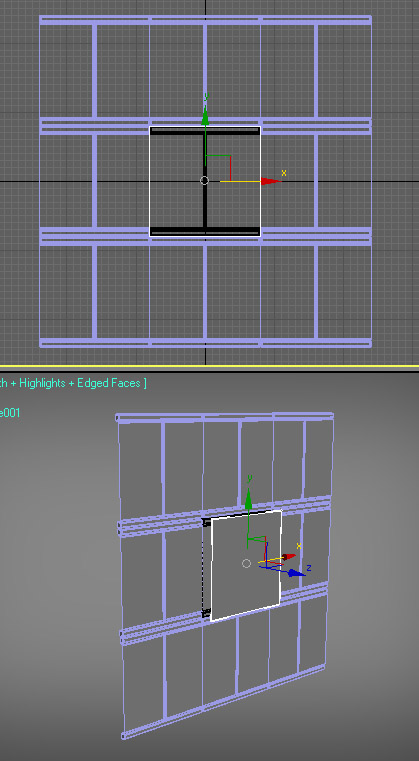
So here's the asset I'll use as example, a pretty simple wall unit. This object is 512x512 units inside 3ds max:

Now place instances of the mesh around all directions, making sure to have snaps to grid on. This is important to ensure correct ambient occlusion on xnormal:
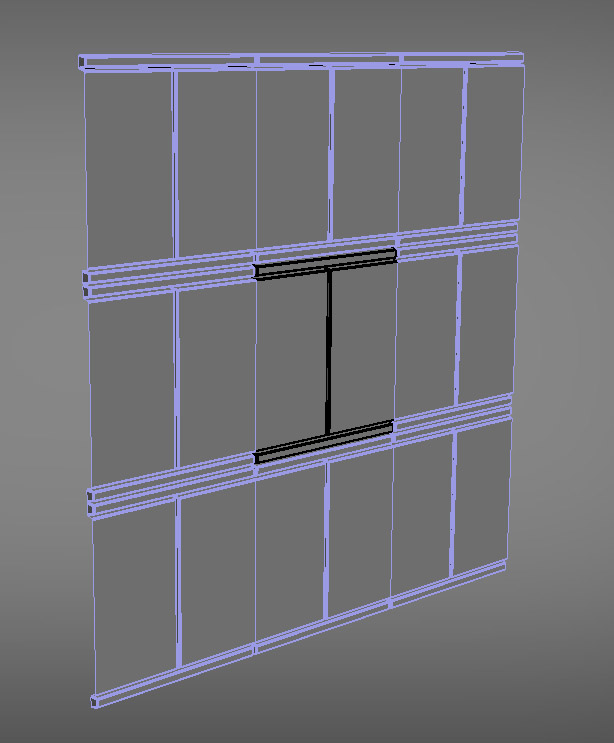
Now place a 512x512 plane on front of the main mesh. Make sure they are perfectly aligned on X and Y but the distance is not important really.
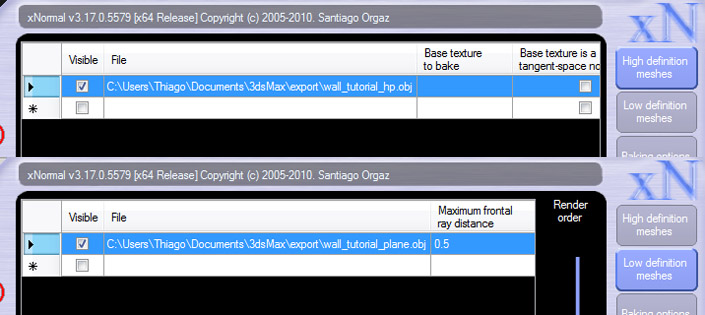
Now export 2 OBJ files: One with the wall pieces and another with just the plane. Do this by selecting the objects and using "Export Selected As".
Xnormal Work
Open xNormal, add your hipoly OBJ on "High Definition Meshes" and your plane OBJ on "Low Definition Meshes" (use the default options):
Now go to Baking Options, set the output file's name and enable the maps you want to bake. In this case I'll only bake Normal and Ambient Occlusion.
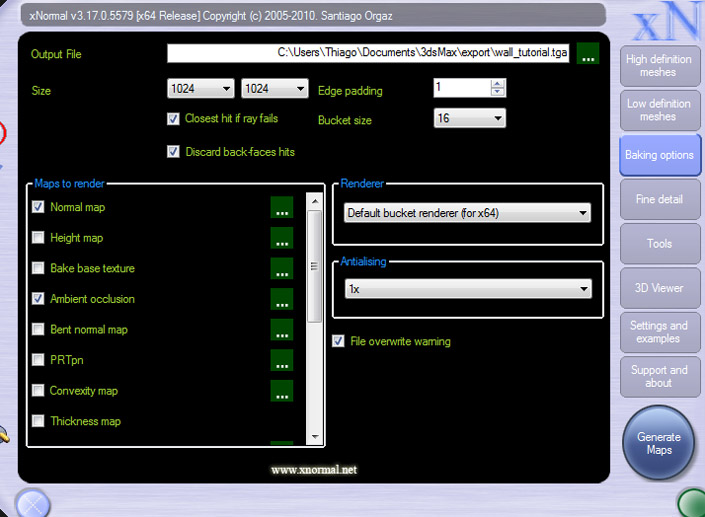
On this screen you can also set a few important settings such as edge padding (how much the UV isles will "bleed", use this to avoid seams), final size etc. You can also adjust the final quality of the maps by changing the Antialiasing factor.
You can also access specific texture map options by clicking on the "..." button next to each map. If you are baking normal maps for UDK or CryEngine3 you will have to change the Swizzle Coordinates to X+ Y- Z+.
Now for Ambient Occlusion you will need to test the options to find out what's better for you. I usually use this setup:
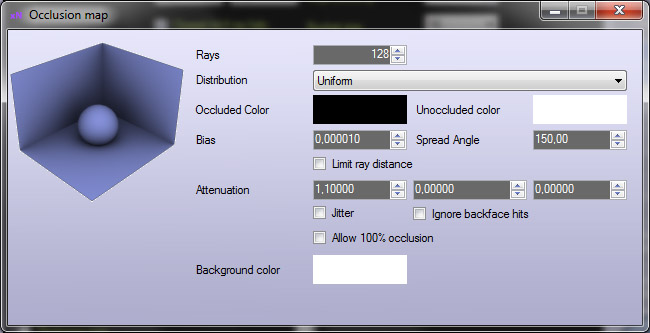
I recommend playing a lot with these settings until you are satisfied with the results.